The Best Chocolate Chip Cookies
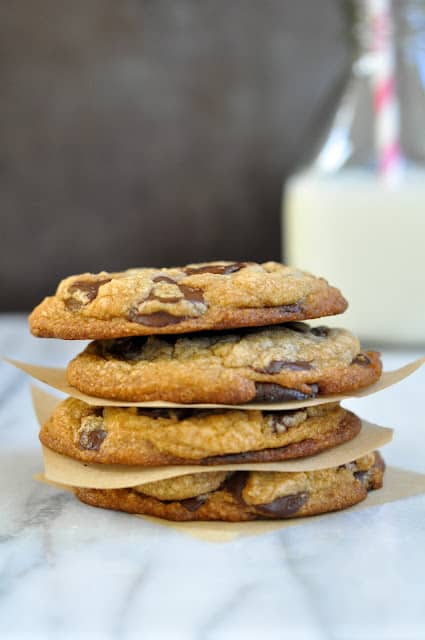
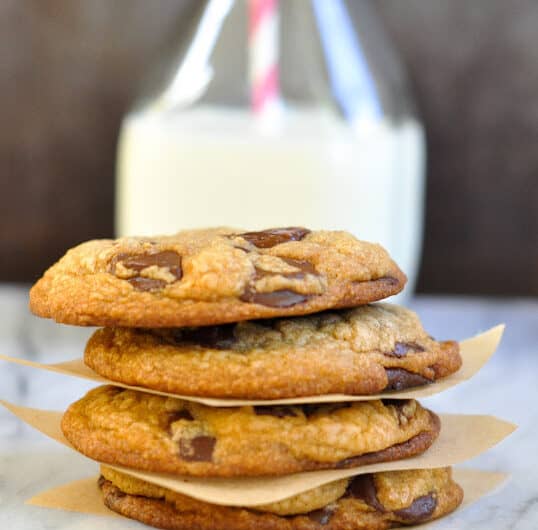
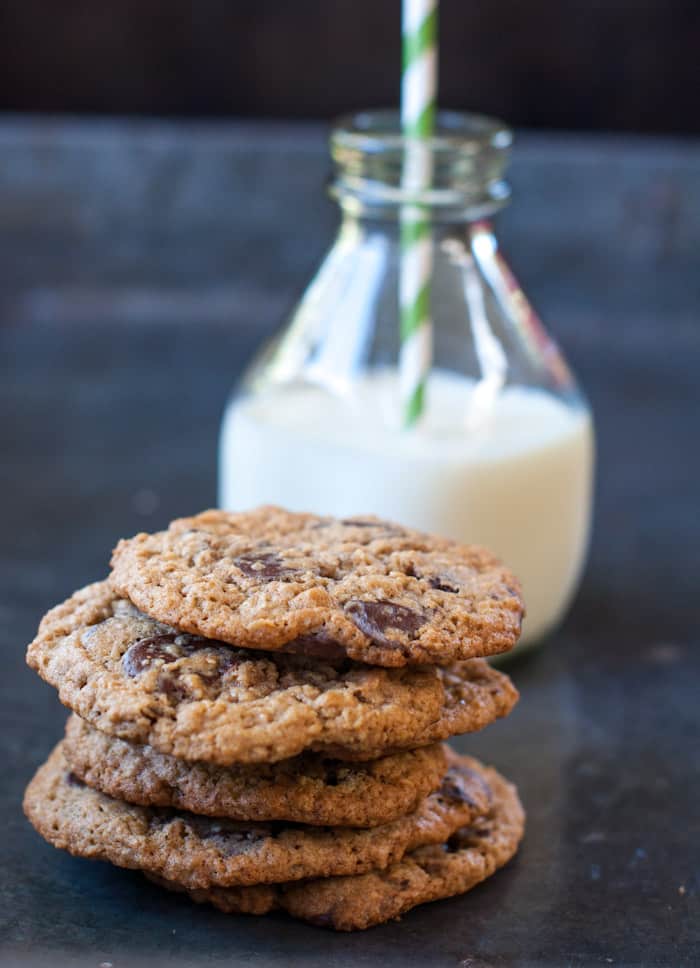
These are the best chocolate chip cookies folks, seriously, you do not need to look any further. This recipe came from Cooks Illustrated so you know it has been tried, tested and approved. These cookies have also been tried, tested and approved in my house as well as many of my friend’s houses, and they are always declared by all as the “best chocolate chip cookie.” I bake these up all the time for bake sales, classroom birthday parties, but I mostly bake them for pure pleasure because they are just so darn good. These cookies have crunchy edges, chewy centers and there are chips in every bite. They’re the perfect afternoon craving throw together at the last minute cookie because you don’t have to plan ahead and bring any of the ingredients to room temperature first. Just grab everything out of the pantry and fridge, mix it together, drop some cookies on a baking sheet and bake away. There’s no need to write more, you just have to trust me and make some up.
The best chocolate chip cookies
Recipe from Cooks Illustrated
Makes 21-24 cookies using a 1 3/4″ ice cream scooper
- 1 3/4 cups all purpose flour – I use King Arthur’s unbleached all purpose flour
- 1/2 teaspoon baking soda
- 14 tablespoons unsalted butter (1 3/4 sticks)
- 1/2 cup granulated sugar
- 3/4 cups packed dark brown sugar (dark brown sugar adds more flavor) – Use fresh, moist brown sugar instead of hardened brown sugar, which will make the cookies dry. I like and use the brand, Wholesome Sweeteners Organic Dark Brown Sugar, as well as the Whole Food’s organic brown sugar.
- 1 teaspoon salt
- 2 teaspoons pure vanilla extract
- 1 large egg – The recipe doesn’t call for the eggs to be at room temp, but if I know I’m making them up ahead of time, I will take them out a bit beforehand.
- 1 large egg yolk
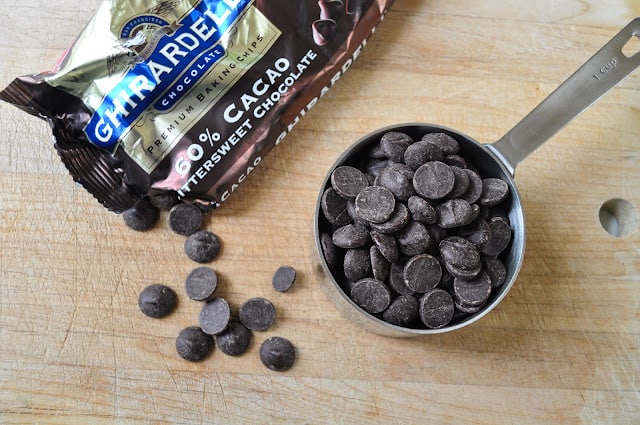
- 1 bag (10-ounces) of chocolate chips or chunks (preferably 60% cacao) – I use Ghirardelli 60% cacao chips.
I like to prep all my ingredients ahead of time so when I have to add them they are ready to go.
Adjust rack (or racks if you have 2 ovens) to middle position and preheat oven/ovens to 375 degrees. Line 2 large baking sheets with parchment paper.
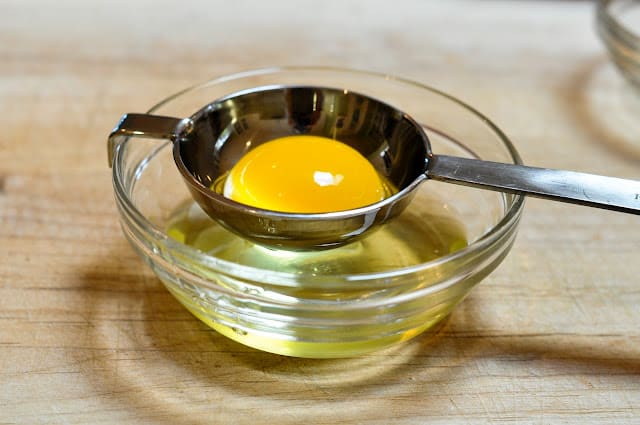
Crack your egg over a small bowl using an egg separator or your hand to separate the egg yolk. Put the egg yolk in a small bowl and set aside.
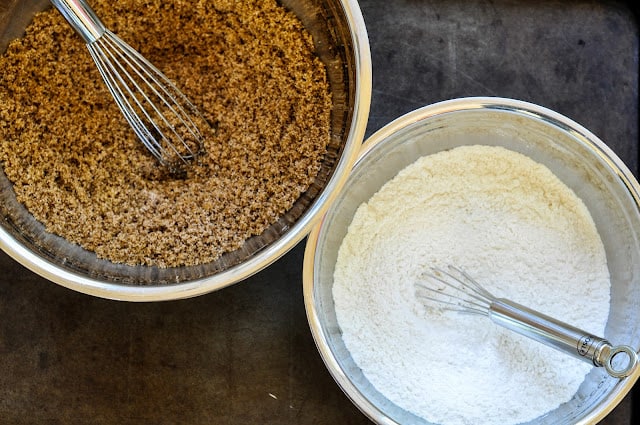
Whisk 1 3/4 cups flour and 1/2 teaspoon baking soda together in a medium bowl and set aside.
Whisk the 1/2 cup sugar, the 3/4 cup brown sugar and the teaspoon salt together in small bowl and set aside.
Divide up the butter, put 10 tablespoons into a 10-inch skillet.
Note: Avoid using a non-stick skillet to brown the butter; the dark color of the nonstick coating makes it difficult to gage when the butter is browned.
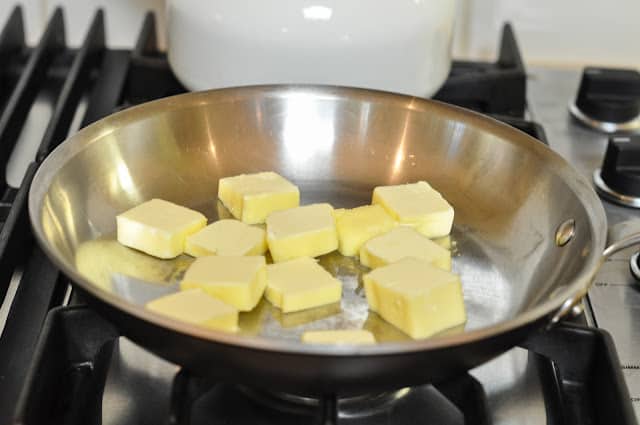
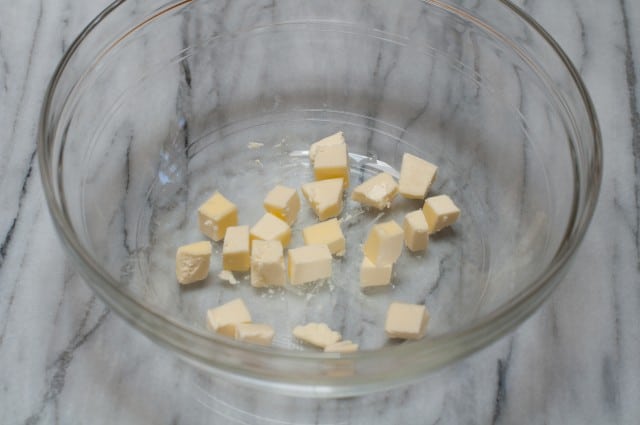
Put the remaining 4 tablespoons butter into a large heatproof bowl.
I recommend cutting up the butter once its divided, so it melts easier.
Heat the 10 tablespoons butter over medium-high heat until melted, about 2 minutes. Continue cooking, swirling pan constantly until butter is dark golden brown and has a nutty aroma, 1 to 3 minutes.
Remove skillet from heat and, using heatproof spatula, transfer browned butter to the heatproof bowl that holds the 4 tablespoons of butter. Stir the butter together until completely melted.
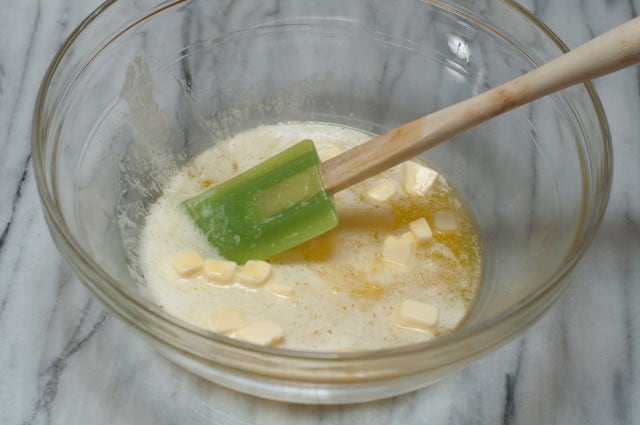
Add the sugar and salt mixture plus the 2 teaspoons vanilla to the bowl with butter and whisk until fully incorporated.
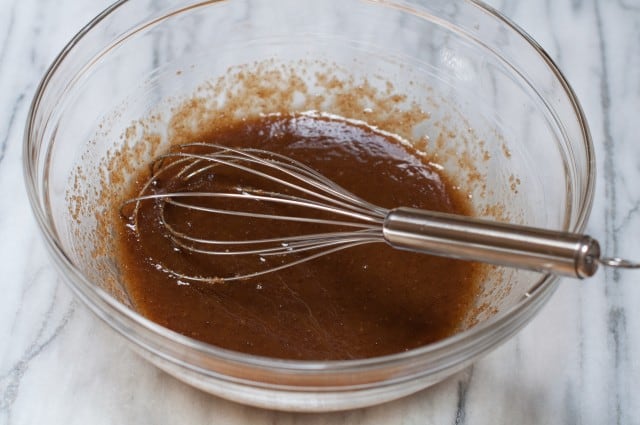
Add in the egg and the yolk and whisk until mixture is smooth with no sugar lumps remaining, about 30 seconds. Let mixture stand 3 minutes, then whisk for 30 seconds.
Chocolate lovers addition! I wanted to share with you all an adaption that my little 8-year old friend Tatum did! Tatum is a chocolate lover, so she decided to add 1/4 cup of melted chocolate chips to the batter at this point. She just melted 1/4 semi-sweet chips (or you can use bittersweet chips) and added it to the batter, making an even more chocolately cookie! I sampled a few of her cookies, and they were super yummy! Thanks Tate, you’re truly a chef in the making!
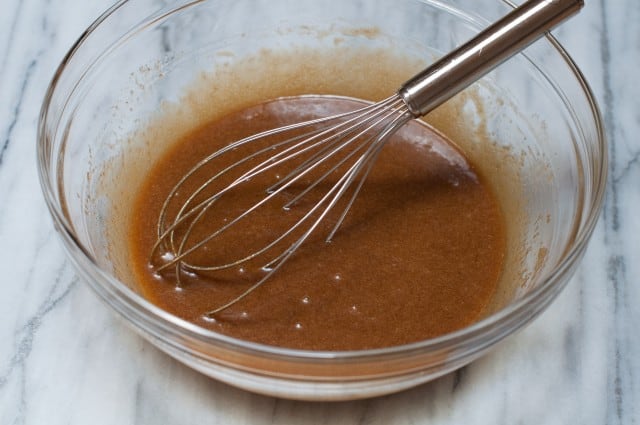
Repeat process of resting and whisking 2-3 more times until mixture is thick, smooth and shiny. NOTE: This whisking and waiting time is an important step and really makes a difference with the texture of the cookies.
The brown sugar mixture will thicken and lighten up as you whisk it and let it rest.
Note: Your batter may not look as thick as my batter in the below photo, but it should still thicken up.
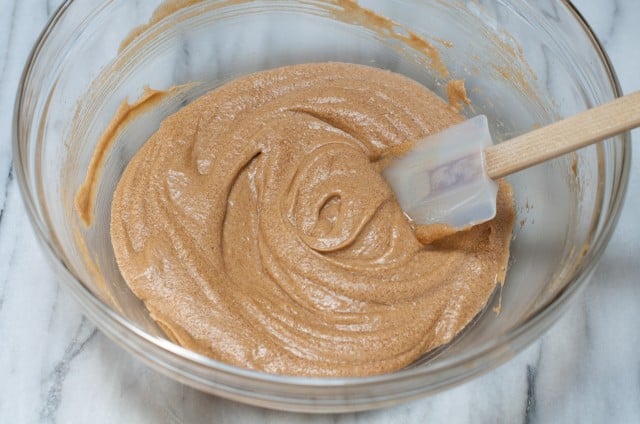
Using rubber spatula or whisk, stir in the flour mixture until just combined. Stir in the chocolate chips, giving the dough a final stir to ensure no flour pockets remain. At this point, I put my batter into the refrigerator for about 5 minutes, as it can sometimes be too soft to handle.
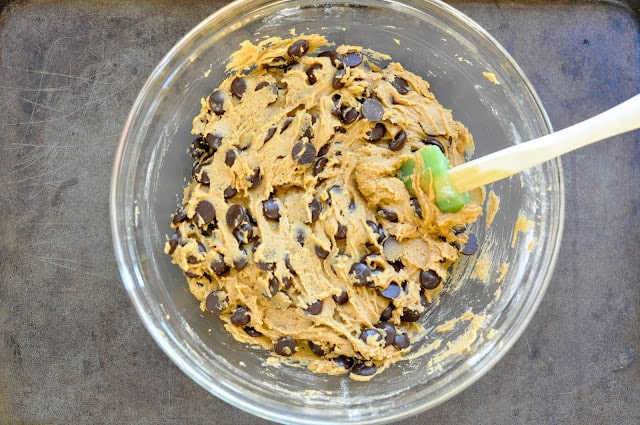
A note about chocolate chips, my family prefers dark chocolate to milk chocolate, so we use these Ghirardelli 60% cacao chips. They are amazing, and they do say that dark chocolate is good for you, so that may help take some of the guilt away. Try them in your next recipe that calls for chocolate chips.
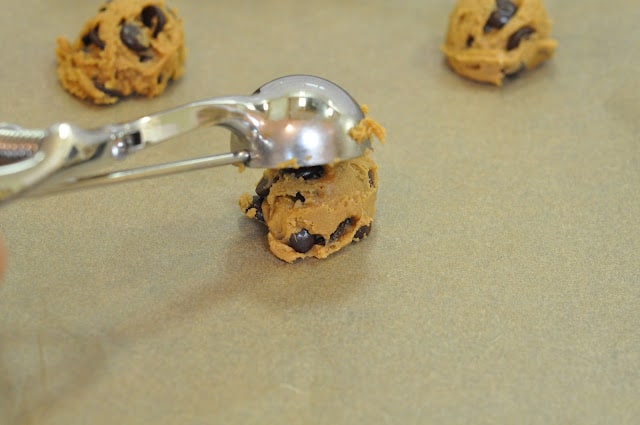
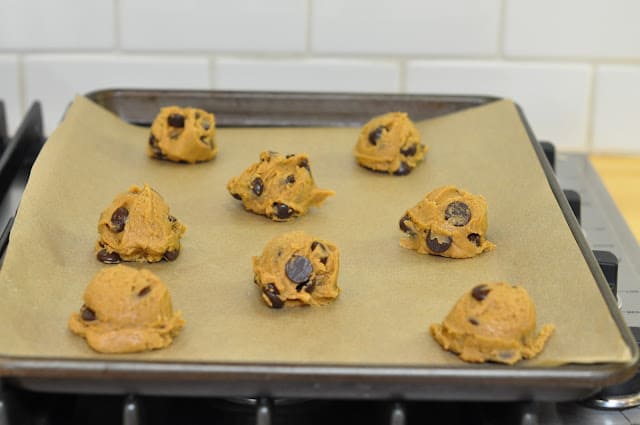
Divide dough into 8 portions per cookie sheet. I use my handy dandy ice-cream scooper here.
The ice cream scooper I used is 1 3/4″. If I use my 2″ scooper than I get 16 cookies per batch. Arrange cookies 2 inches apart on the prepared baking sheets. You will have 8 dough balls per sheet.
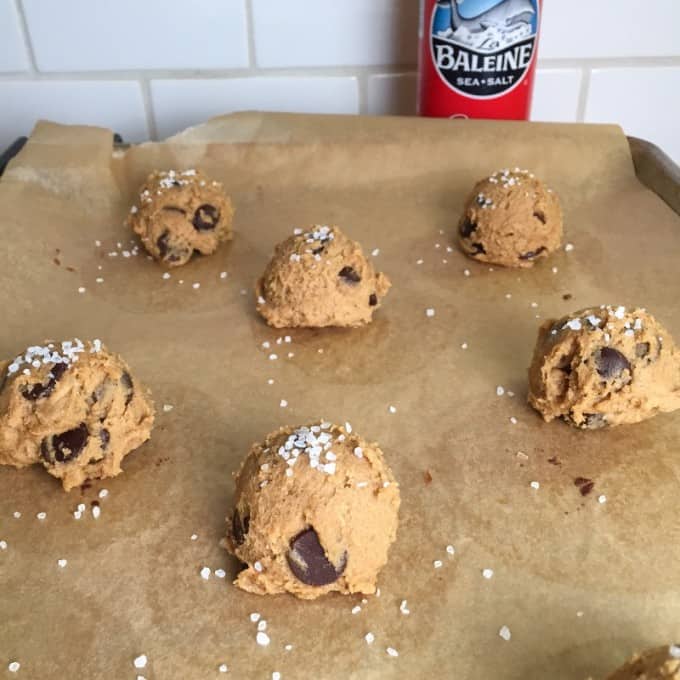
If you wanted to add a bit of Maldon or flaky sea salt crystals to the tops of the cookie, you can do so at this point. Just sprinkle a bit on the top of each dough ball.
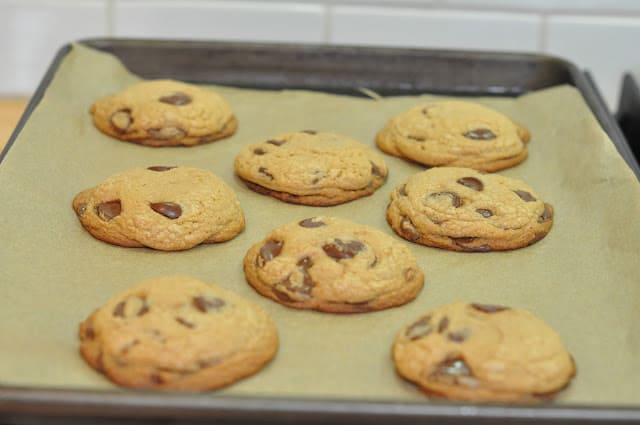
Bake cookies 1 tray at a time (or both trays if you have a double oven) until cookies are golden brown and still puffy, and edges have begun to set but centers are still soft, 10 to 14 minutes. You will want to rotate the baking sheets halfway through baking (after 5 minutes).
In my oven the total cooking time is about 10 minutes.
Note: They may look under baked in the center but don’t fret, they will brown and firm up once they are out of the oven.
Transfer cookies to wire rack to cool.
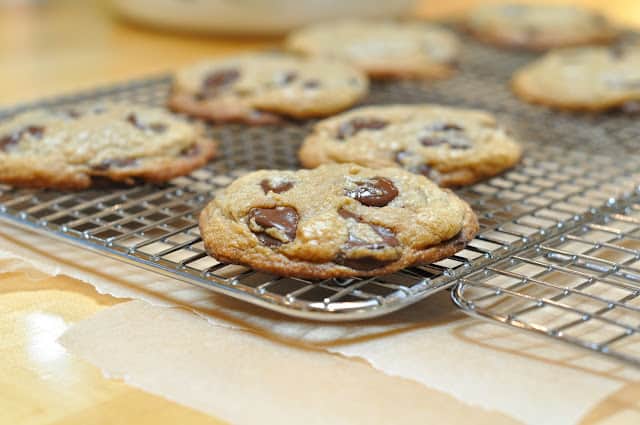
We always have a cookie when they are still warm and the chocolate chips are gooey! Pair it up with a tall glass of milk and you have the perfect dessert or snack!
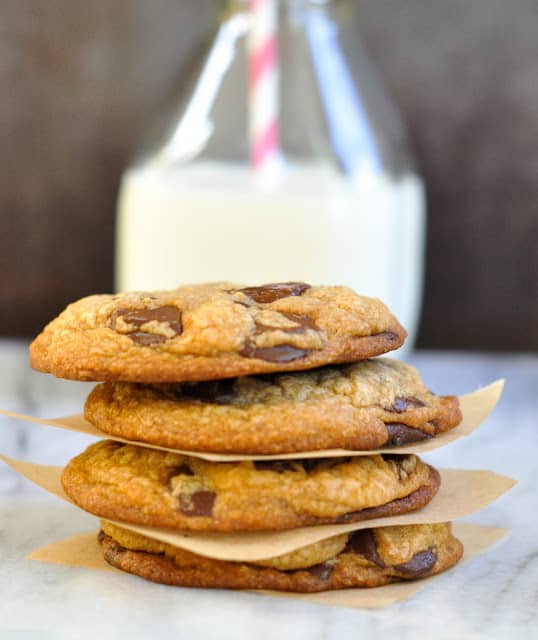
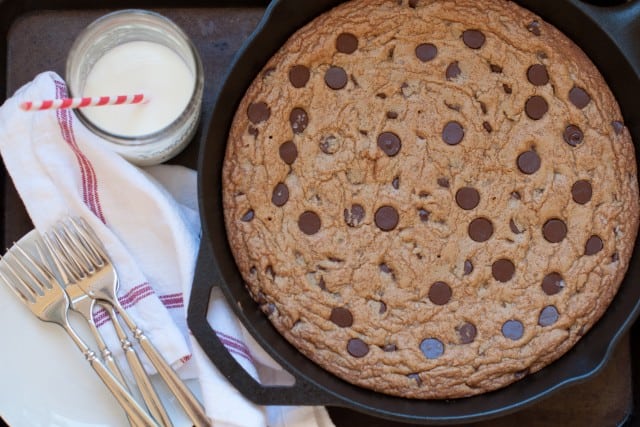
I just recently took this recipe and threw it all into a 12-inch cast iron skillet to make the best chocolate chip skillet cookie. So, if you’re looking to make up a “big” cookie then give this skillet cookie a try.
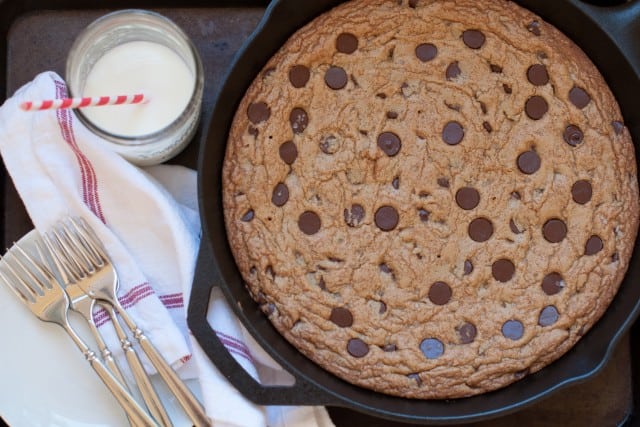
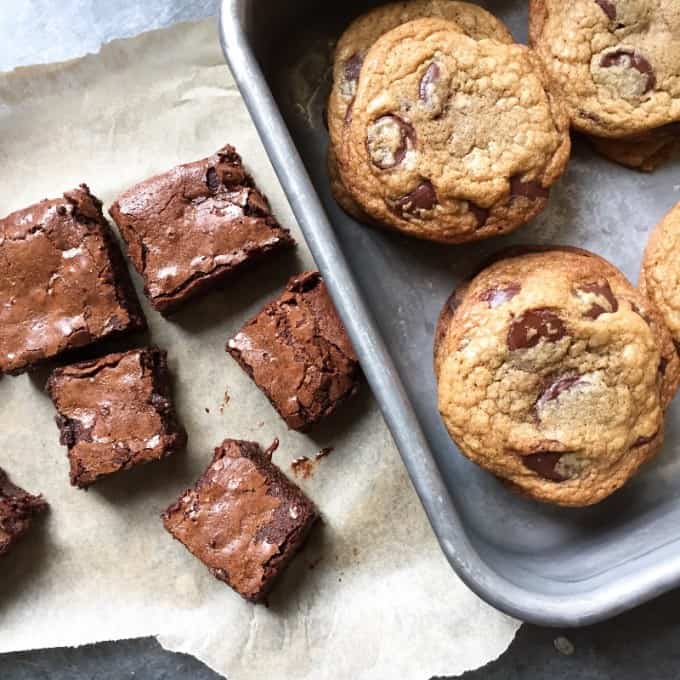
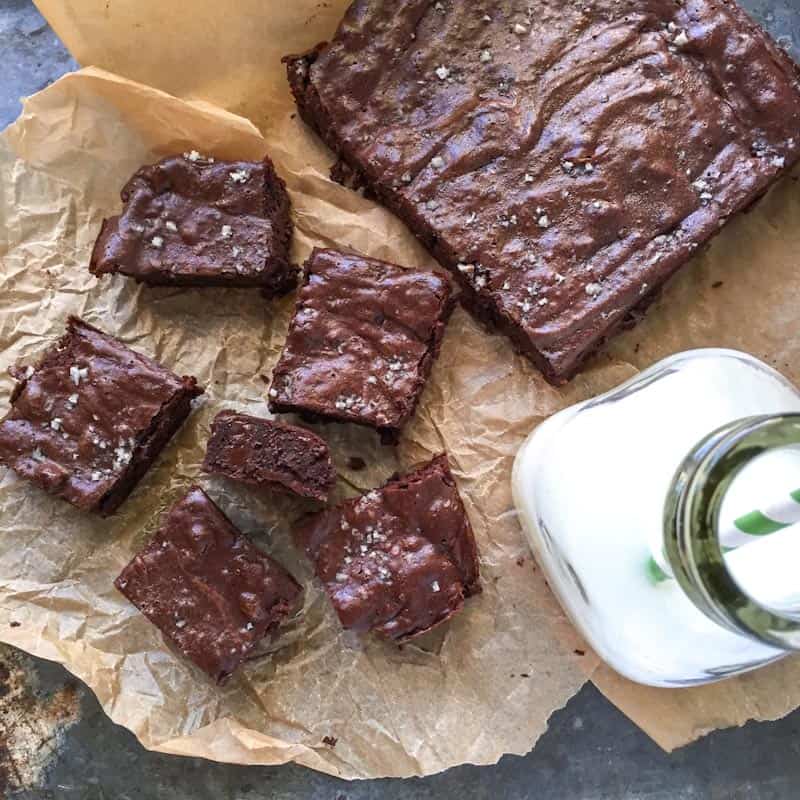
I love taking these cookies to a party paired with our favorite fudgey brownies ever! You can’t go wrong with either of these desserts!

Looking for a gluten-free version of a chocolate chip cookie? Then you have to try my gluten-free cookie bites, they are made with 5 simple pantry ingredients and the 2 main ingredients are walnuts and dates. The walnuts add a buttery taste and the dates add the sweet, but without the refined sugar. Try them, they’re amazing and totally kid approved!
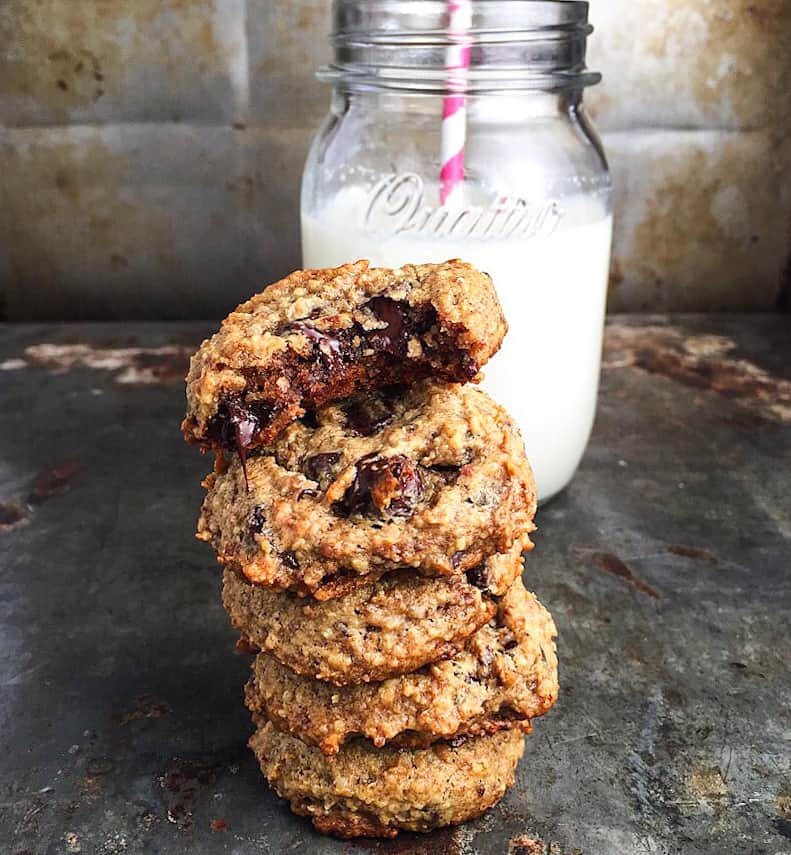
I’ve also made a gluten-free version of our favorite brownie recipe ever and it tastes totally the same as the original version! Try it!

The Best Chocolate Chip Cookies
21-24
cookiesIngredients
1 ¾ cups all purpose flour - I use King Arthur's unbleached all purpose flour
½ teaspoon baking soda
14 tablespoons unsalted butter (1¾ sticks)
½ cup granulated sugar
¾ cups packed dark brown sugar (dark brown sugar adds more flavor) - Use fresh, moist brown sugar instead of hardened brown sugar, which will make the cookies dry. I like and use the brand, Wholesome Sweeteners Organic Dark Brown Sugar, as well as the Whole Food's organic brown sugar.
1 teaspoon salt
2 teaspoons pure vanilla extract
1 large egg - The recipe doesn't call for the eggs to be at room temp, but if I know I'm making them up ahead of time, I will take them out a bit beforehand.
1 large egg yolk
1 bag (10-ounces) of chocolate chips or chunks (preferably 60% cacao) - I use Ghirardelli 60% cacao chips
Directions
I like to prep all my ingredients ahead of time so when I have to add them they are ready to go.
Adjust rack (or racks if you have 2 ovens) to middle position and preheat oven/ovens to 375 degrees.
Line 2 large baking sheets with parchment paper.
Crack your egg over a small bowl using an egg separator or your hand to separate the egg yolk. Put the egg yolk in a small bowl and set aside.
Whisk 1¾ cups flour and ½ teaspoon baking soda together in a medium bowl and set aside.
Whisk the ½ cup sugar, the ¾ cup brown sugar and the teaspoon salt together in small bowl and set aside.
Divide up the butter, put 10 tablespoons into a 10-inch skillet.
Note: Avoid using a non-stick skillet to brown the butter; the dark color of the nonstick coating makes it difficult to gage when the butter is browned.
Put the remaining 4 tablespoons butter into a large heatproof bowl. I recommend cutting up the butter once its divided, so it melts easier.
Heat the 10 tablespoons butter over medium-high heat until melted, about 2 minutes. Continue cooking, swirling pan constantly until butter is dark golden brown and has a nutty aroma, 1 to 3 minutes. Remove skillet from heat and, using heatproof spatula, transfer browned butter to the heatproof bowl that holds the 4 tablespoons of butter. Stir the butter together until completely melted.
Add the sugar and salt mixture plus the 2 teaspoons vanilla to the bowl with butter and whisk until fully incorporated.
Add in the egg and the yolk and whisk until mixture is smooth with no sugar lumps remaining, about 30 seconds.
Let mixture stand 3 minutes, then whisk for 30 seconds. Repeat process of resting and whisking 2-3 more times until mixture is thick, smooth and shiny. NOTE: This whisking and waiting time is an important step and really makes a difference with the texture of the cookies.
Note: The brown sugar mixture will lighten up and thicken as you whisk it and let it rest.
Using rubber spatula or whisk, stir in the flour mixture until just combined.
Stir in the chocolate chips, giving the dough a final stir to ensure no flour pockets remain. At this point, I put my batter into the refrigerator for about 5 minutes, as it can sometimes be too soft to handle.
Divide dough into 8 portions per cookie sheet. I use my handy dandy ice-cream scooper here.
The ice cream scooper I used is 1¾". If I use my 2" scooper than I get 16 cookies per batch. Arrange cookies 2 inches apart on the prepared baking sheets. You will have 8 dough balls per sheet.
If you wanted to add a bit of Maldon or flaky sea salt crystals to the tops of the cookie, you can do so at this point. Just sprinkle a bit on the top of each dough ball.
Bake cookies 1 tray at a time (or both trays if you have a double oven) until cookies are golden brown and still puffy, and edges have begun to set but centers are still soft, 10 to 14 minutes. You will want to rotate the baking sheets halfway through baking (after 5 minutes).
In my oven the total cooking time is about 10 minutes.
Note: They may look under baked in the center but don't fret, they will brown and firm up once they are out of the oven.
Transfer cookies to wire rack to cool. We always have a cookie when they are still warm and the chocolate chips are gooey! Pair it up with a tall glass of milk and you have the perfect dessert or snack!
Did you make this recipe?
Tag @marinmamacooks on Instagram and hashtag it #MarinMamaCooks
Like this recipe?
Follow us @marinmama on Pinterest
Did you make this recipe?
Follow us on Facebook
Nourish your inbox!
Dairy free green goddess dressing. This is my dairy free, vegan take on a green goddess dressing. I wanted to create a tasty dairy free version, while focusing on keeping the ingredients ultra clean, so I used a coconut based yogurt @cocojune_organic that doesn’t contain gums, or other ingredients you can’t pronounce.
Comment “green” and I’ll DM you the recipe link.
The result, we love this dressing and have been making it on repeat. I love how creamy and vibrant this dressing is and how it coats each piece of lettuce. I also love how interchangeable the herbs are. You can truly use what you have on hand.
This dressing isn’t just for salads, you can use as a dip for veggies, sweet potato fries, or drizzle over grilled or roasted chicken. The possibilities are endless. 💕
#greengoddessdressing #greengoddesssalad #greengoddess #healthyfood #saladdressing #dairyfreesalad #dairyfreerecipes #vegandressing #vegansalad #salad #healthysalad #healthysalads

I want to share with you guys a simple lesson about reading ingredients. Here’s my favorite brand of coconut milk, Native Forest. As you can see, they have 2 kinds of the full fat unsweetened coconut milk, one is called simple, and one is classic. The difference here is in the ingredients, one contains guar gum and one doesn’t.
You really want to look at the labels and the ingredients, and not just trust the brand is the same across all products.
I love this Native Forest, Simple, because again it clearly states no quars, and if you look in the ingredients, you’ll see organic coconut milk, organic coconut, filtered water. Simple whole food ingredients, no added fillers, gums, or flavors. You always want to look for a BPA free cans and the USDA organic stamp, which means its certified organic, so there’s no GMO’s, pesticides etc.
What is guar gum, and why is it bad?
Guar gum, which is derived from the guar bean is a thickening agent that can wreak havoc on your digestive system by causing bloating, gas, and discomfort. It can disrupt the delicate balance of your gut microbiome, leading to inflammation and impaired nutrient absorption. It’s also seen a lot in non-dairy creamers or milks.
Was this helpful? If so, let me know in the comments below, 👇 as well as what else you would like to see, or know more about?
#readlabels #readfoodlabels #guargum #guthealth #guthealing #inflammationrelief #antiimflammatory

Easy buckwheat porridge. If you’re looking to switch up your morning bowl of oats, then give buckwheat a try. It has a chewy texture and mild flavor, that pairs with just about anything.
Comment ‘easy buckwheat’ and I’ll send you the recipe.
This buckwheat porridge is SO EASY to make, and is naturally gluten-free, dairy-free, and vegan to boot, and the bonus is it takes under 15 minutes to whip up in the morning.
This breakfast is hubby approved. Steve tried this the other day and kept saying, “this is the best breakfast,” “man, this is SO good.” So if I can get my mountain biking, carb loving hubby to happily eat of bowl of this, then I think your family might love this too.
I love topping mine with blueberries, @socotahini and bee pollen!
#buckwheat #buckwheatporridge #buckwheatrecipes #porridgebowl #porridge #porridgelover #breakfastideas #breakfast #healthybreakfast #healthybreakfastclub #healthybreakfastideas

Rosemary & thyme turkey burgers. These are not your typical dry turkey burgers. The rosemary and thyme paired with the sautéed red onion give these burgers a pop of flavor, and the Dijon and avocado oil pump up the moisture. These burgers are also gluten-free and dairy-free.
Comment ‘turkey burger’ and I’ll DM you the recipe link.
I love topping these burgers on a big green salad and pairing them with my oven roasted sweet potato fries. Delish! #turkeyburger #turkeyburgers #burger #dairyfreeglutenfree #burgers #healthyfood

These vegan Mexican quinoa bowls have become a weekly staple in our house. They’re naturally vegan, but are full of flavor from the avocado tahini, and spicy chipotle tahini sauce.
Comment ‘vegan bowl’ and I’ll DM you the recipe.
These bowls are also great for those that are on the candida diet.
I ❤️ these bowls because they’re jam packed with plant protein, as quinoa is a complete protein, and beans when paired with the quinoa, make a complete protein too. This bowl is balanced and satisfying from the slow burning carbs, healthy fats, plant protein, and will honestly sustain you for hours.
These bowls are a great weeknight meatless dinner option, as I typically make the sauces ahead of time, (they literally take 5 minutes) so when it comes to dinner time, all I have to do is make the quinoa (takes under 20 minutes) and roast the sweet potatoes. I hope you give these a try, and that they become a go-to meatless dinner.
#candidadiet #candidacleanse #veganbowls #veganbowls #veganrecipes #veganrecipe #vegandinner #vegandinnerideas #healthyfood

Here’s the perfect snack for those of you trying to cut back on refined sugar. These healthy no bake cacao oat bars are super addicting, once you have a bite, you just can’t stop.
Comment ‘oat bars’ and I’ll DM you the recipe.
The great thing is you don’t have to feel guilty, as these are made with pretty healthy ingredients and are GF, DF and refined sugar free. I love having these on hand for that afternoon, or post lunch craving. They hit the spot perfectly. #healthy #healthysnacks #healthysnackideas #healthysnack #refinedsugarfree #norefinedsugar #healthydesserts #healthydessert #healthydessertrecipes #healthysnackrecipes






I think I need to bake a batch of cookies now. Those look like heaven! Love the dark sugar and the dark chips!
Your picture was so beautiful I couldn’t resist favoriting on FoodGawker and clicking through immediately! I already have a go-to chocolate chip cookie recipe, but these look incredible…might even replace the others!
Thanks so much Sarah! I had a few go-to recipes as well but am stuck on this one as the cookies come out perfectly every time. I would love to hear what your recipe is though?
I have made a lot of chocolate chip cookies and tried a lot of recipes and this one is one the best. My family LOVED them. As a matter of fact, the first night I made them they were all gone when I woke up the next morning. Had to make them again the next day. Try this recipe, you will not be disappointed!
Hi Faye & Yvonne! I am so glad you LOVED the cookies and that these are a new favorite in your house. I made 2 batches last week myself because they went so fast. Thanks for the shout out!
Hi Jacquelyn,
I have been looking forever for a recipe that produced flatter cookies with cripsy edges and chewy centres.
I found this post via Foodgawker and baked them up right away and I have to say that they are sooooo good. These are by far the best chocolate chip cookies I’ve ever, ever made. They disappeared in next to no time and I can’t wait to make another batch.
I’ve been testing chocolate chip cookies for what has seemed like since the beginning of time and none hold the potential of this one. All the other recipes I tested used the creaming method for the butter and sugar but this one was a complete revelation to me – melted, browned butter. Pure genius! The melted butter makes all the difference! I’ll never go back.
I’m so pleased with this recipe. There are a zillion and one chocolate chip recipes being blogged about and in cookbooks and finding The One has been like trying to find a needle in a haystack. You can’t imagine how much it will change my chocolate chip cookie baking life! It’s amazing that I didn’t even need to pull out the mixer.
Thank you so, so much for sharing this recipe and for your great blog!
Judy
Wow, thanks Judy for the amazing comment. It totally made my morning 😉 I got this recipe from cooks illustrated and they test these recipes to the ground to create perfection, so I knew going into it they would be great. I have been making these for years and every time I bring them to a function or dinner party people say they are the best chocolate chip cookies. I am excited that you found your go-to recipe for chocolate chip cookies. This is my go-to recipe as well as my chocolate cake one from Barefoot. I make those two all the time and I don’t feel the need to find another one. It’s nice when you can narrow down your recipe box to your favorites. Have a wonderful day Judy and please let me know if you try any other recipes!
I am making these cookies this weekend, can’t wait! I love to make cookies and CC are my favs and my peeps love them too. SO, this will be an adventure to see how they turn out….will let you know!
Madeline Schaider
Hi Madeline! I can’t wait to hear how you like them. Please stop back and let me know. I brought them to a dinner party last weekend and people said they were the best CC cookies they had ever had, so I hope your friends feel the same.
I couldn’t resist making these cookies again. Twice in a week. These will be my Go-To Chocolate Chip Cookie. Did I mention already how much I love these?
You totally had me with your photos on Foodgawker. Thank you for changing my chocolate chip cookie life, Jacquelyn. Really love all your step-by-step recipe posts too.
Judy
Wow! Thanks so much Judy! I am so glad you loved these and that they are going to be your go-to chocolate chip cookie. It’s wonderful when you can find a perfect cake, cookie and brownie recipe. I have my 3 favorites on this blog and I constantly make them and feel confident making them because they are my go-to recipes. They will be the recipes that my kids make for their kids, I hope!
Have a great day Judy and thanks for stopping by 🙂
xo,
Jackie
The C.I. recipe is always a great one. I find that I do get better results from creaming rather than melting the butter though. When I let it melt, my cookies are a little on the thinner side, whereas creaming is a guaranteed thicker (and chewier) cookie. Love this recipe though!
I have seriously made these cookies at least 10 times in the past few weeks. LOVE this recipe. It’s my new go-to and I consider myself a CCC connoisseur, they are that good. Thank you for sharing this recipe.
You both rock, and I’m so happy that baker extraordinaires like youself love this recipe! You have reminded me that I need to make up another batch of these cookies, and like SOON!
What type of flour do you use? Unbleached AP flour or Cake flour or Bread flour?
I just updated the recipe as I guess it really does matter what flour I use, right? Thanks for the tip. I use King Arthur’s unbleached all purpose flour.
How long does it take the brown the butter? I assume it’ll be similar if I’m using Earth Balance soy butter (i have a butter phobia…) And what brands do you recommend for the dark brown sugar? I’m not sure i know the difference between the kind you suggest and the kind that will make cookies dry…
Hi Rebecca! Once the butter is melted, it takes about 1-2 minutes to brown it. You really don’t want it totally brown, but want it to sit on the heat for a bit after it has melted. I just go for the smell. Once it starts smelling a bit nutty in aroma, I take it off the heat (get up close to your pan to smell it). Make sure to keep swirling the pan so the butter does not scorch. If you are worried about it, just time it for 1 1/2 minutes your first time. If you start getting a nutty smell earlier, then take the butter off the heat. I have made these cookies so many times and some times the butter has cooked for 3 minutes and other times it has cooked for 1 minute. They always turn out great, so it really hasn’t mattered. I will try and get a photo up to show people that step, but it’s hard to do as it’s such a quick process. I have never used soy butter, so I can’t help you there, sorry! What is it about butter you don’t like?
I use all types of brown sugar. My favorite dark brown sugar at the moment is this brand I get at Whole Foods called, Wholesome Sweeteners organic dark brown sugar. I also like the Whole Foods organic brand of brown sugars. I’m sure any type of dark brown sugar would work well. It is recommended that you use dark brown sugar for this recipe.
Let me know if you have any other questions! I’m happy to be of help. Good luck! I just made these again last week and they are SO good!
Well, butter being pure fat is the biggest turn-off, mostly psychologically… I want to enjoy food, even dessert, without feeling like I’m hurting myself. I know it may seem sort of extreme, but the texture of butter when I get it on my hands is how I imagine it would be inside my body, clogging my arteries, etc. And the soy butter has good fat in it, poly and mono unsaturated and I really like the texture and flavor.
Thanks for the feedback, I will definitely keep a keen eye for Wholesome Sweeteners. 🙂
I totally get the butter thing Rebecca. I am the same way with certain foods as well, and sometimes I get slack for it. We’re all different and we all have our things, its what makes us unique.
You may want to try the below recipe from my friend Em. She has a “healthy” cookie recipe (no butter) and you can visit her link here. I haven’t tried it yet as my kids like the more “traditional” sweets, but I am going to try it this fall when they are back in school.
http://wineandbutter.com/vegan-chocolate-chip-peanut-butter-cookies/
Take care!
Thank you for the website, very thoughtful 🙂 but I’m still going to try yours! I have one more question, why do you melt all but 4 tbs of the butter? Is there a flavor/texture difference as opposed to browning all 14 tbs?
Hi Rebecca. Glad you want to still try the cookies 🙂 This recipe was from cooks illustrated and they broke the whole recipe down and explained why they browned the butter and why they whisked the sugars together with the butter etc. They did not explain why they melted only a portion of the butter though. Maybe they only melted a portion because it would not taste the same if all of the butter was browned, since browning the butter adds a nutty flavor to the cookies. The 4 tablespoons melt quickly though when you add the browned butter, so its just as easy. I trust cooks illustrated because they know their stuff, so I tend to not improvise when making a recipe from their site.
I have a convection oven. Do I still need to bake one pan at a time?
Hi Susana! I prefer to cook one sheet at a time when I make cookies, but you can totally throw both trays in there. Just place the racks in the upper and lower thirds of your oven and make sure to rotate the sheets halfway through the cooking time. You know what’s sad? I have a convection oven and have yet to use it, so I’m really not an expert when it comes to cooking in a convection oven. I guess I’m pretty old school 🙂
I am always looking for a better chocolate chip cookie. I found it…here!! These are incredible, even if they are a bit more involved. It’s worth it. I substituted 1 tsp of the vanilla with 1 tsp of coffee extract. Delicious! Thanks so much for sharing the recipe.
Hi Lane! I’m so happy that you love these cookies. I think the extra steps involved in making these cookies are worth it though! I like your substitution of coffee extract for vanilla, very interesting. I should try that next time. 😉
Hi Jackie
I loved the step by step pictures as I am a visual learner this helped alot the cookies are still in the oven but can’t wait to try them
Hi Elisha! I’m the same way as you, I’m very visual and I need photos! That’s why I take all the photos I do because I know I’m not the only one who likes (and needs) to see the photos! I hope they turn out great! I love taking that first bite after they cool a bit when the chips are all melty! Yum! xoxo, Jackie
I am going to have to try these soon! But first, a quick question. While the first pan is baking, what do you do with the remainder of the dough? Do you let it sit at room temperature? Or do you refrigerate? Seems like subsequent batches spread a little more if left at room temp.
Hi Rhonda! Good question. I would put the dough in the refrigerator while the first batch of cookies are baking. You can even put all of the dough the fridge after it’s mixed for about 10 minutes to cool a bit if you want. I sometimes do that if it’s really warm out. I hope you love them 🙂
These cookies were AMAZING!!!! Thanks for the recipe!
Awesome Stephanie! We made them tonight and I swear they were the best batch we ever made. So glad you enjoyed them as well 🙂
THESE WERE SO GOOD!! I did make a few changes, I only used 1 cup of semi sweet chocolate chips instead of a whole bag, just preference. And I used 1 cup regular all purpose flour and 3/4 cup white whole wheat all purpose flour, not for any particular reason. I think I used a much smaller scoop, I ended up with 35 cookies, perfect smaller size, but I swear I could have just eaten the cookie dough it was SOOOO good, which is probably why I didn’t have 36 ; ) Thanks for the great recipe!!!
Awesome Sylvia! I’m so glad you made them and loved them. I also love that you tweaked them and they came out perfect! I know, the dough is super addicting. My kids always come in and take a few spoonfuls! Thanks for stopping by and letting me know how they turned out! 🙂
Love these! Great stuff, Jackie. Thank you.
Thanks Will! I’m so glad you liked them 🙂
Hi! im making these at the moment, but my sugar and butter mixture just wont thicken, i’m allowing it to rest like you suggested, repeated the process several times, but the batter just won’t thicken, what should i do?
Hi Aarifah! Double check that you added all of the ingredients to the brown sugar mixture (sugar, brown sugar and salt). Did you add the egg and the egg yolk and the vanilla to the mixture as well? Also, your mixture may not thicken up as much as mine did in the photo, but it should thicken a bit. Ok, let me know if you did all of the above that I just stated.
Just so you know, I make these ALL the time and one time I didn’t add enough flour by mistake and my cookies came out flat and spilled out all over the baking sheet. I couldn’t figure out what happened and you know what? I double checked in my head the list of ingredients and realized that I was short 1/4 cup of flour, so now I double check what I do each time because it’s easy to forget or measure something wrong!
I just made these last night for my husband to hand-out at work during his 2 1/2 hour presentation. They turned out so well! Baked for 12 minutes in my oven. Followed the recipe to a T but I used my KitchenAid since it was easier than doing by hand. I want to add chopped pecans next time. Really tasty. I used a smaller scoop and got 30 cookies. The last batch I over baked by 1-2 minutes but I prefer them that way as they were more crunchy…yummy!
Hi Charity! What a nice wife you are to make these for your hubby’s presentation. I’m sure his staff totally appreciated it and I love that you had a few extra leftover for yourself to nibble on! So cool that you got 30 cookies from this recipe. I need to keep that in mind next time one of my kid’s has a class party since there are 26 plus kids in their classes now. Thanks so much for stopping by and letting me know how the cookies turned out for you. I really appreciate it 🙂 xoxo, Jackie
Hi, do you need to alter this recipe for high altitude? Thank you!
Hi Keri! I really don’t know too much about high altitude baking, so I don’t really know how you would or if you need to adjust the recipe. I wish I could be of more help girl! 🙂 xoxo, Jackie
I just made these. I had to> After all, it’s freezing here in New York and what better thing to do on a wintry day then to bake! They were delicious – not too sweet, which I personally don’t like. Great texture. I love that I didn’t have to haul out the mixer. I baked these for 12 minutes, but I think next time (the rest of the dough is in the freezer ready for a “cookie emergency – which I have frequently) I will bake them for about 11 minutes so they’re a tiny more chewy. I really like your blog and your incredible attention to detail. I was thinking to myself that it really must take so much of your time to do this blog and then I read your wonderfully honest post about taking a break. How refreshing to read that. You are an interesting and “real” person. Thank you for being so honest. It’s refreshing.
Hi Donna! First off, I’m so happy to hear that you made and LOVED these cookies. Mine take 10 minutes to cook to perfection, so 11 minutes sounds perf! Thanks so much for your super sweet comment regarding the blog. Yes, it takes tons of time to write each post, and lately I haven’t had as much time to work on the blog, as I’m working full-time, but I know it’s all ok and that my readers totally understand and just want me to post when I can, and that helps me so much! I try and be real on this blog when I can because I really believe that the more authentic we are, the more people can feel good about being authentic themselves. We all have to stop putting on airs, as well as playing roles and become a bit more humble! Anyway, that’s what I’m trying to do! Thanks so much for saying hi girl! xoxo, Jackie
I agree about “putting on airs”. Have a great rest of the evening, Jackie! I will be trying your other recipes soon.
Donna
I made the skillet cookie the other day and it was so good that I knew I would have to try the recipe as regular cookies. They turned out amazing!
I really love your blog – you do a great job writing up the recipes and I have loved everything I’ve tried from your site. I feel like you are my recipe curator who has found all these delicious things to eat… I trust that when I make something from your site, it will come out correct and chances are high that it’ll be very tasty. Thanks Jackie!
Yaay! I’m so glad you made and loved the cookie version as well. I’m making up a batch for an Olympic party tomorrow night. They’re so easy and a kid favorite!
Thanks so much for your kind words girl, I’m SO happy that you love my blog and that you love the recipes, it really makes me happy to hear that. I’m having a hard time lately with working and all to try new recipes, but I will hopefully get some time soon. You have inspired me to try that farro version of the one-pan pasta, so thanks! xoxo, Jackie
Just fit in your recipe blogging when time permits and you’re in the mood. Life can be crazy, busy, hectic, and hard, but it can also be really rewarding. I have to remember to find time for the things I enjoy, otherwise they never will happen! Hope the new job is going well 🙂
I just made a batch of cookies and we loved them!!!
Although it’s always a little hard to bake English or American recipes as the ingredients you get here are – naturally – different ones and you sometimes must improvise. Plus, calculations of temperatures, weight units etc. are a little annoying.
Still, the cookies as well as the Israeli couscous salad turned out great which means these things won’t stop me from trying your recipes!
Thanks for all the good ideas and step-by-step instructions!
Verena
Hi Verena! Thanks for your super sweet comment and I’m happy to hear that you love the cookies! I really want to get a scale in my kitchen so I can start figuring how to convert my recipes to ounces and such for everyone that lives outside of the United States. Thanks for trying the recipes even though there are some conversions you have to make on your end. Have a blissful week! xoxo, Jacquelyn
Would you suggest doubling the recipe? I would love to try these out, but need to make a much larger quantity of cookies. Also, how big in diameter do your cookies turn out to be? Would you be against reducing the scoop size to make smaller ones?
Hi Andrea. Yes, you can totally double the recipe! My cookies are about 3 inches in diameter? I listed on the post what scoop I use for the smaller cookies. You might just want to check them a minute earlier if you’re going to make them smaller in size. Let me know if you have any other questions. xoxo, Jackie
Just made these and consumer one… AMAZING!!! The best ever. Thank you and thanks to CI… Now what to do with them so I don’t eat the entire batch.
I made several batches over the course of a month this past winter, and had to stop…I could not control myself – they were so good.
Awesome Donna! I’m so glad you love these cookies! 🙂 xoxo, Jacquelyn
Yaay! I’m so glad you LOVE these cookies! They only last 2 days in my house 🙂 xoxo, Jacquelyn
Um, wow. I made these this morning to give to the farmers at our local farmer’s market. They were pretty much losing it. Let’s just say, we got some free vegetables. 🙂
I used all sucanat (evaporated cane juice) in place of the granulated sugar and brown sugar, and einkorn wheat flour in place of the all-purpose flour, and they turned out awesome. The browned butter/sugar/egg/whisking thing is extremely cool. Before your eyes, this stuff turns into something that looks heavenly and smells like caramel. Thanks for posting this!
Awesome news Angela! I love that the cookies were not only a hit with you, but with your farmers as well. How sweet of you to make them for them. I may have to try your healthier substitutes next time. Thanks for posting what you did, as it’s helpful for those readers of mine that want to try a healthier cookie 🙂 Cheers! xoxo, Jacquelyn
It appears that I, like others, can not stop making these cookies. I made another batch for the family yesterday, this time with coconut sugar and sprouted einkorn flour, and they were just as amazing as the first batch! My husband who was trying them for the first time just closed his eyes and said, “Oh wow.” That’s a big compliment. 🙂 We also made your favorite kale salad last night with dinner and everyone loved it. We already eat a ton of kale, but always cooked, so this was so fun to have it a new way!
Yaay! I’m super happy you are loving this recipe and that your hubby is as well, bonus!!! Ok, I have to try your substitutes, asthey sound amazing and won’t make me feel so guilty for making and downing so many cookies next time 🙂 Thanks for posting Angela 🙂 xoxo, Jacquelyn
great blog. glad I stumbled upon it. for future reference, it’s “friends’ houses” instead of “friend’s” unless you were talking about one friend, which I don’t think was the case here. just have a habit of dropping grammar fixes on blogs that I think are worth the extra effort. looking forward to following this recipe. thank you!
Hi Deanna! Thanks for the grammar fix! I will admit that I’m not always the best at it, so thanks for your help! I hope you love and devour the cookies 🙂 xoxo, Jacquelyn
Just new to your Blog, don’t know why I never found it before!! Have tried several things and love everything so far, just made these choc chip cookies, mine are delicious although a little flatter looking than your pictures, I didn’t have all purpose flour and used cake flour, I’m thinking that could have made the difference, I will defiantly try again after buying all purpose flour.
Hi Tami! Welcome! I’m so happy that you stumbled on my blog! Yippee! It’s also great to hear that you’ve found some recipes on here that you’ve made and enjoyed. I once forgot to add a 1/2 cup of flour and the cookies were flat, but still super good! I do know that when you use cake flour in lieu of all-purpose flour, you will need to add more cake flour to the recipe. I guess for every cup of all-purpose flour, you need 1 cup and 2 TBL of cake flour. Cake flour has less protein and is softer than all-purpose. Anyway, the cookies sounded like they tasted great, so that’s good news! Thanks for saying hi Tami 🙂 xoxo, Jacquelyn
Hi, its me from your chocolate cake page, asking questions again!
So I decided I’m going to take your advice and make these instead of the sea salted ones. As I was looking at the recipe for the sea salted ones, I noticed that you sprinkled the salt on top of the cookies before you baked them. So I was just wondering if the same method would work for these, if I sprinkled flaked sea salt on top?
Hi Beverly! Yay! I’m so excited that you’re going to make these up! I just updated the post to show when to add the sea salt crystals. I had made a batch recently with sea salt and took a photo, so I added the photo as well, but you are correct, you just add the sea salt to the top of each cookie before you bake them! Be sure to make a few without the sea salt, because these cookies are pure perfection on their own! I hope you enjoy them and please report back after you try them 🙂 xoxo, Jacquelyn
Oh, I feel so honoured you posted that picture for me! And thank you for the reply, I shall be making these to share tomorrow and will follow your advice about putting the salt on some and not others and will feedback to you!
You’re too cute girl! I can’t wait to hear what you think about them after you make them 🙂
I must say it didn’t look promising before the addition of the egg, but from then on everything was beautiful. When I tried to eat them warm, they just fell apart and had the most amazing texture and taste. When they firmed up when cooled they had a fudgey texture which made them moreish. I shared them with friends and they went down really well!
Hi Beverly! It’s funny because I made those cookies along with my favorite brownies the same day to take to a client of mine! I was thinking about you as I was whipping up the cookies, knowing that you were making them as well. I’m glad you liked them sweetie! xoxo, Jacquelyn
Made these chocolate chunk cookies today and they were exceptional. The only substitution I made was Callebaut brand chocolate chunks instead of Ghiradelli chocolate. We like Callebaut brand chocolate best. Next up will be your brownie recipe. I will be spending more time in the gym to burn off your recipes. You rock Mama!
Yay! I’m so happy to hear that you made and loved these cookies. Maybe I will try them with some Callebaut chocolate next. I love chocolate, so why not! Are you going to make the brownies using that chocolate? Let me know how they turn out and what type of chocolate you use in the recipe, 60%, 70% etc. By the way, I hit the gym and trails at least 4 times a week to burn off all the recipes I have to test and make over and over again! 😉 Thanks sweetie! xoxo Jacquelyn
I tried this recipe yesterday and could not have been happier! I used mini chocolate chips instead of regular, next time I will make them with dark chocolate chunks!
Hi! I really love this cookie so much! I made this today but mine turned out a little flat and didn’t rise as much. Can you please tell me what went wrong? Thank you so much xx
hmmmm… did you use baking soda or baking powder? Sometimes if you mix them up that can change the volume of a recipe. This recipe calls for baking soda but sometimes people use baking power by mistake. The outside temp can also affect baking, if it’s super hot and humid for instance. These don’t tend to rise too much, but if you’ve made them before and they went flat today, then it could be due to anything. One time I forgot to add the 3/4 cup flour and they were like puddles, so I always triple check that I’ve put all of my ingredients in before I start molding the cookies. I hope that helped :).