Easy Oven Baked Sweet Potato Fries
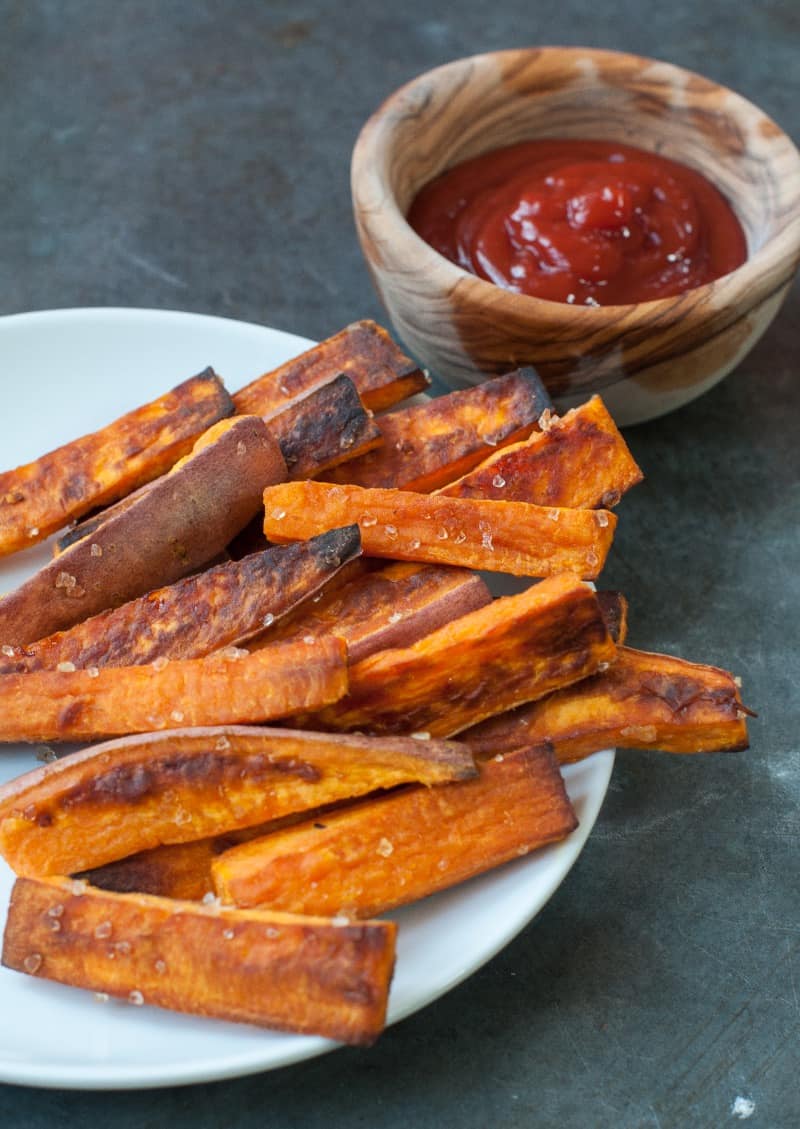
These fries are SO GOOD, SUPER ADDICTIVE and honestly as easy to make up as the frozen variety (and cheaper too). They’re browned, caramelized and slightly crispy on the outside, and soft, sweet and tender on the inside. I’ll admit that these fries are not going to be crispy, (like fries that have been fried) they tend to be softer like steak fries.
In the past few weeks these “fries” have become our new favorite dinner/lunch side, and one of the kid’s favorite after school snacks. I hate even calling these fries, because fries have such a bad rap, and these are healthy. I call them fries because it gets kids excited to try them, but between you and me, these are really just roasted sweet potatoes in fry form!

See, these fries make my kiddos silly and happy! I’m even getting the thumbs up from Eli’s friend Robby. Make these fries up for your kiddos and they will be happy to!
These fries are SUPER easy to make. Just take a sweet potato, slice it up into fries, toss the fries with a bit of coconut oil and coarse sea salt, and then bake them in the oven for 20 minutes. The whole process from start to finish takes roughly 25 minutes.
Let’s be honest, most frozen sweet potato fries take 25-30 minutes to bake up, and they’re frozen peeps, while these take less time and are fresh! Hmm… fresh or frozen, not much of a decision here.
Nutritional benefits of sweet potatoes:
- Sweet potatoes are an excellent source of beta-carotene (select ones with the darkest orange flesh, as they have the highest amount of beta-carotene). To help your body better absorb the full benefits of beta-carotene, add a healthy fat like coconut oil, butter, or ghee to your sweet potato (coconut oil is a great healthy fat for the brain).
- Sweet potatoes help stabilize blood sugar levels and improve the response to the hormone insulin.
- They’re one of the most nutrient-dense vegetables.
- They help quench thirst and lubricate dry conditions, which is perfect for us all in the winter, as that’s when most of use tend to get dry skin conditions.
- They’re high in vitamin A & C, making them an easy and tasty source for kid’s to get their vitamin A.
Buying and storing: Try and purchase sweet potatoes that have a smooth skin with no bruises or scars, and be sure to store sweet potatoes in a dry, cool place.
I baked up some fries for lunch the other day and paired with my favorite kale salad, and I have to say that I was one happy Marin mama! This lunch kept me full and satisfied until dinner!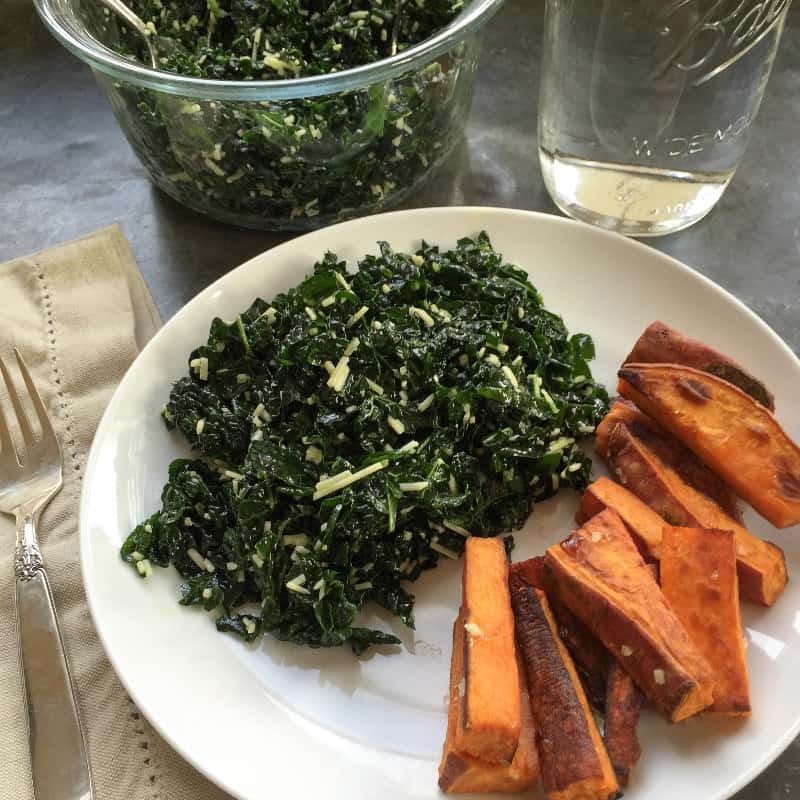
Easy Oven Baked Sweet Potato Fries
serves 4 as a side
I like to keep these fries on simple side by just using coconut oil and sea salt, but feel free to spice them up and add a pinch of cayenne pepper, cumin, paprika or curry powder. It’s really up to you!
- 2 medium-sized sweet potatoes, washed and scrubbed
- 1 to 2 tablespoons extra virgin coconut oil, melted- You want just enough oil to lightly and evenly coat the fries
- Coarse or fine Celtic sea salt – approximately 1 teaspoon or more depending on how salty you like your fries
- Optional – freshly ground pepper – I don’t add this, as my kid’s are not huge pepper fans
Pre-heat the oven to 450 degrees and line a rimmed baking sheet with parchment paper.
MARIN MAMA TIPS:
- Don’t bake the sweet potato fries with anything else in the oven, as they will not turn out very crispy.
- Don’t overcrowd the fries or cook them too close together, or else they will sweat instead of brown and crisp up.
You can peel the sweet potatoes, or keep the skin on and scrub and wash the potatoes. I prefer to keep the skin on, as it adds some dietary fiber, and my kids don’t mind the skin at all.
After washing and scrubbing the sweet potato, dry it using either a towel or paper towel. If the sweet potato is too wet then the fries will be soggy.
Slice off the two skinny ends. Cut the sweet potato in half crosswise.
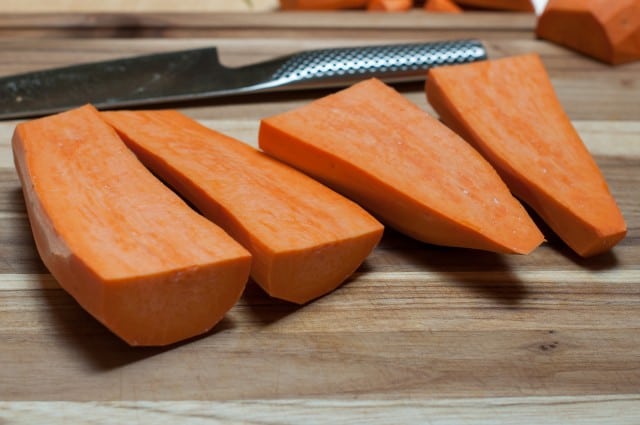
Take each half of the sweet potato and cut it into planks, about 3/4 inch thick. I usually get about 4-5 planks from each half.
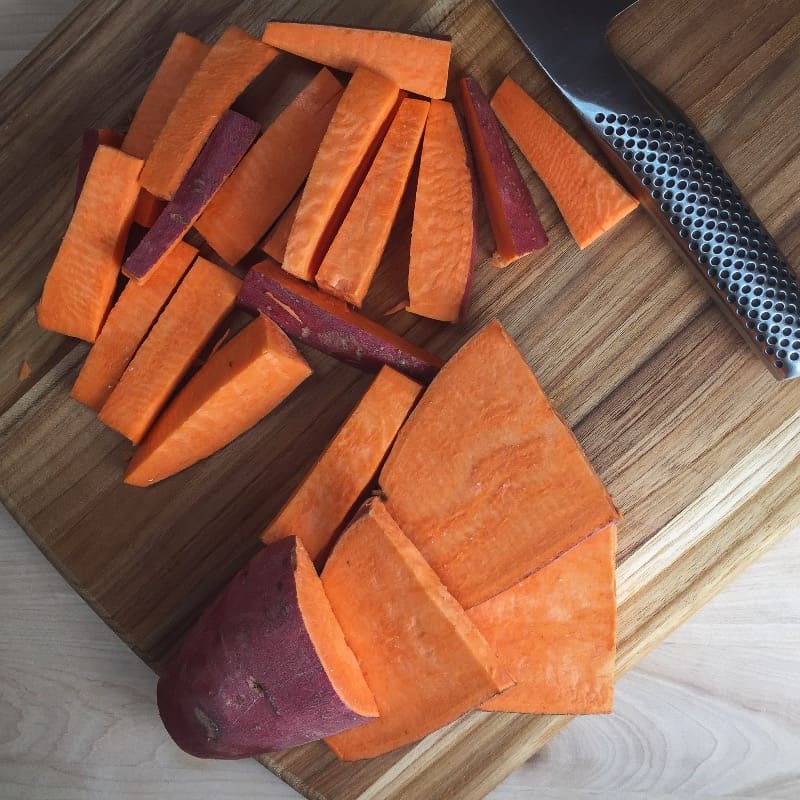
Then cut the planks into fries. Try to cut them all evenly, so they all cook at the same rate. I typically get about 4-5 fries per slice.
Put the fries in a large bowl and toss them with the coconut oil and sea salt. Use only enough oil to lightly and evenly coat the fries. You don’t want them sitting in a pool of oil.
Once everything’s mixed, lift up the fries and space them out evenly on the prepared baking sheet. Make sure they’re not touching and have ample space around them, or else they will get soggy and not crisp up.
Put the fries in the pre-heated 450 degree oven on the middle rack for 12 minutes, then take them out and flip them over using tongs, a spatula or your bare hands (which I tend to do because my hands are heat-resistant).
Keep an eye on the fries the first time you bake them, as every oven is different and some may cook the fries faster than 12 minutes. You definitely don’t want black fries, yuck!
Once your fries are flipped, put them back in the oven for another 8-10 minutes. I would check your fries at the 8-minute mark and see how they’re doing. You want both sides to be puffed up in texture, evenly browned and slightly crispy. You don’t want to overcook the fries and have them be black, as they will be dry inside and taste charred.
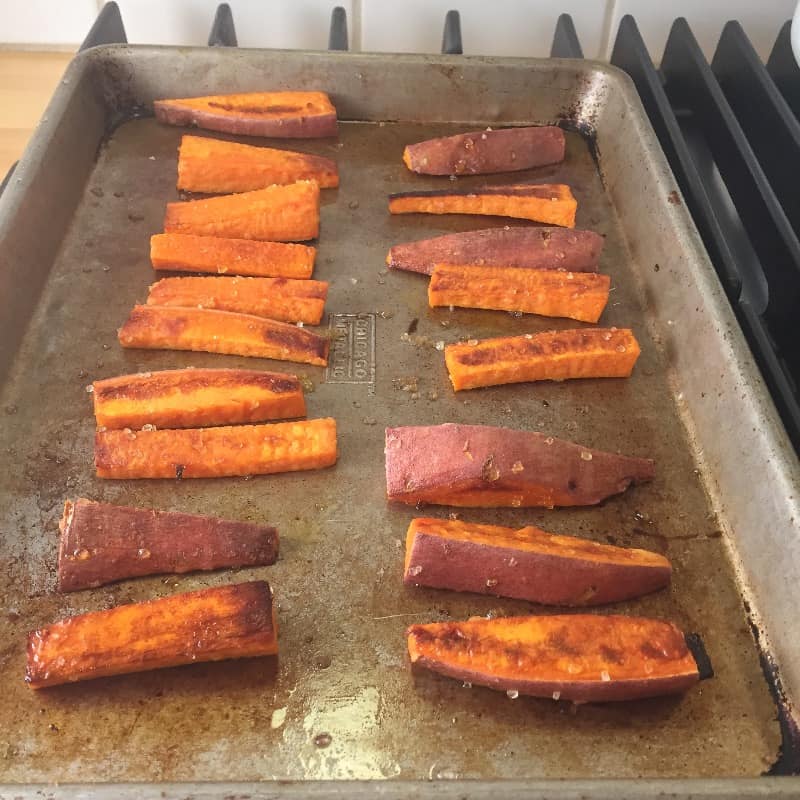
Note: Keep in mind that baking time may vary depending on how large you cut your sweet potatoes and how accurate your oven is.
If you want crispier fries, try adding a generous pinch of cornstarch to the fries before tossing and baking. I personally have never tried this technique, but I hear that it works. I’m honestly happy with the consistency of the fries cooking them without cornstarch, but if any of you give the cornstarch a try, let me know how it turns out for you.
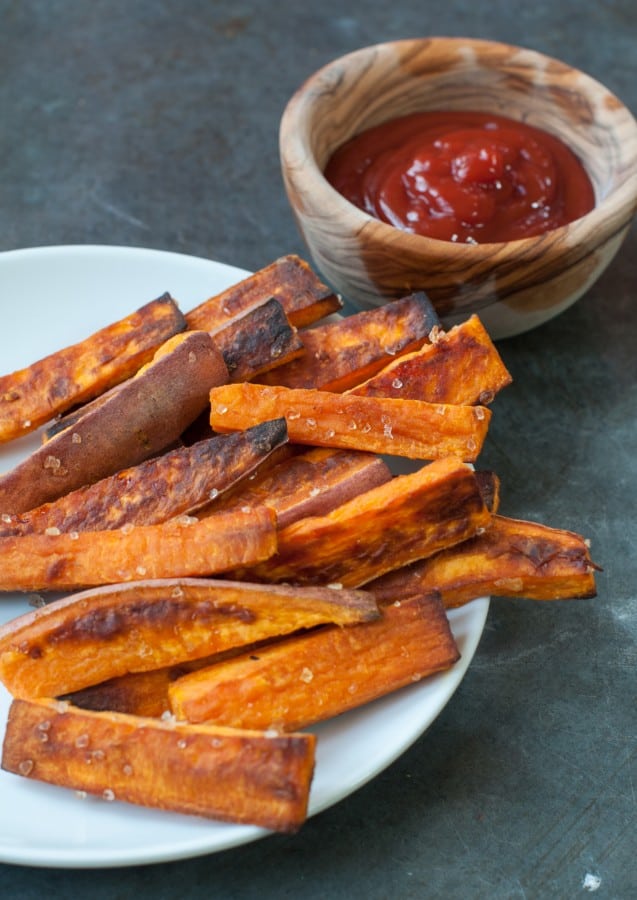
Dunk these fries into some ketchup, your favorite aioli or some ketchup spiked with Sriracha. We’ve love pairing them with ketchup and chipotle mayo.
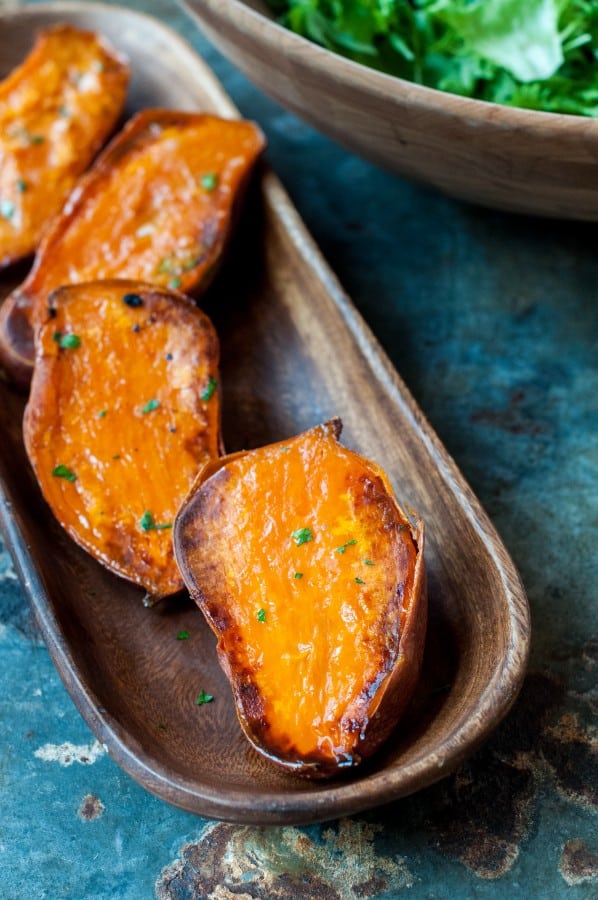
Here’s another kid approved sweet potato recipe, oven roasted sweet potato halves. Roasting sweet potato halves is SO EASY! The whole process takes 35 minutes! Just slice those bad boys in half, slather them with melted coconut oil and some coarse sea salt, lay them face down on a parchment-lined baking sheet, and bake them for approx 30 minutes in a pre-heated 400 degree oven. When they come out, they’re caramelized on the flesh and soft and sweet on the inside. Delish! These are simply amazing and may even become your new favorite side dish.

Easy Oven Baked Sweet Potato Fries
4
servings10
minutes20
minutes30
minutesI like to keep these fries on simple side by just using coconut oil and sea salt, but feel free to spice them up and add a pinch of cayenne pepper, cumin, paprika or curry powder. It's really up to you!
Ingredients
2 medium-sized sweet potatoes, washed and scrubbed
1 to 2 tablespoons extra virgin coconut oil, melted- You want just enough oil to lightly and evenly coat the fries
Coarse or fine Celtic sea salt – approximately 1 teaspoon or more depending on how salty you like your fries
Optional – freshly ground pepper – I don’t add this, as my kid’s are not huge pepper fans
Directions
Pre-heat the oven to 450 degrees! Line a rimmed baking sheet with parchment paper.
MARIN MAMA TIPS: Don't bake the sweet potato fries with anything else in the oven, as they will not turn out very crispy. Don't overcrowd the fries or cook them too close together, or else they will sweat instead of brown and crisp up.
You can peel the sweet potatoes, or keep the skin on and scrub and wash the potatoes. I prefer to keep the skin on, as it adds some dietary fiber, and my kids don’t mind the skin at all.
After washing and scrubbing the sweet potato, dry it using either a towel or paper towel. If the sweet potato is too wet then the fries will be soggy.
Slice off the two skinny ends, and cut the sweet potato in half crosswise.
Take each half of the sweet potato and cut it into planks, about ¾ inch thick. I usually get about 4-5 planks from each half.
Then cut the planks into fries. Try to cut them all evenly, so they all cook at the same rate. I typically get about 4-5 fries per slice.
Put the fries in a large bowl and toss them with the coconut oil and sea salt. Use only enough oil to lightly and evenly coat the fries, as you don't want them sitting in a pool of oil.
Once everything's mixed, lift up the fries and space them out evenly on the prepared baking sheet. Make sure they're not touching and have ample space around them, or else they will get soggy and not crisp up.
Put the fries in the pre-heated 450 degree oven on a center rack for 12 minutes, then take them out and flip them over using tongs, a spatula, or your bare hands (which I tend to do because my hands are heat-resistant). Keep an eye on the fries the first time you bake them, as every oven is different and some may cook the fries faster than 12 minutes. You definitely don't want black fries, yuck!
Once your fries are flipped, put them back in the oven for another 8-10 minutes. I would check your fries at the 8-minute mark and see how they're doing. You want both sides to be puffed up in texture, evenly browned and slightly crispy. You don't want to overcook the fries and have them be black, as they will be dry inside and taste charred.
Note: Keep in mind that baking time may vary depending on how large you cut your sweet potatoes and how accurate your oven is.
Dunk these fries into some ketchup, your favorite aioli or some ketchup spiked with Sriracha. We love pairing them with ketchup and chipotle mayo.
Notes
- If you want crispier fries, try adding a generous pinch of cornstarch to the fries before tossing and baking. I personally have never tried this technique, but I hear that it works. I'm honestly happy with the consistency of the fries cooking them without cornstarch, but if any of you give the cornstarch a try, let me know how it turns out for you.
Did you make this recipe?
Tag @marinmamacooks on Instagram and hashtag it #MarinMamaCooks
Like this recipe?
Follow us @marinmama on Pinterest
Did you make this recipe?
Follow us on Facebook
- Recipe | Candida Friendly | Dairy Free | Fall | Family Favorites | Gluten Free | Spring | Vegan | Vegetarian | Winter
Nourish your inbox!
Dairy free green goddess dressing. This is my dairy free, vegan take on a green goddess dressing. I wanted to create a tasty dairy free version, while focusing on keeping the ingredients ultra clean, so I used a coconut based yogurt @cocojune_organic that doesn’t contain gums, or other ingredients you can’t pronounce.
Comment “green” and I’ll DM you the recipe link.
The result, we love this dressing and have been making it on repeat. I love how creamy and vibrant this dressing is and how it coats each piece of lettuce. I also love how interchangeable the herbs are. You can truly use what you have on hand.
This dressing isn’t just for salads, you can use as a dip for veggies, sweet potato fries, or drizzle over grilled or roasted chicken. The possibilities are endless. 💕
#greengoddessdressing #greengoddesssalad #greengoddess #healthyfood #saladdressing #dairyfreesalad #dairyfreerecipes #vegandressing #vegansalad #salad #healthysalad #healthysalads

I want to share with you guys a simple lesson about reading ingredients. Here’s my favorite brand of coconut milk, Native Forest. As you can see, they have 2 kinds of the full fat unsweetened coconut milk, one is called simple, and one is classic. The difference here is in the ingredients, one contains guar gum and one doesn’t.
You really want to look at the labels and the ingredients, and not just trust the brand is the same across all products.
I love this Native Forest, Simple, because again it clearly states no quars, and if you look in the ingredients, you’ll see organic coconut milk, organic coconut, filtered water. Simple whole food ingredients, no added fillers, gums, or flavors. You always want to look for a BPA free cans and the USDA organic stamp, which means its certified organic, so there’s no GMO’s, pesticides etc.
What is guar gum, and why is it bad?
Guar gum, which is derived from the guar bean is a thickening agent that can wreak havoc on your digestive system by causing bloating, gas, and discomfort. It can disrupt the delicate balance of your gut microbiome, leading to inflammation and impaired nutrient absorption. It’s also seen a lot in non-dairy creamers or milks.
Was this helpful? If so, let me know in the comments below, 👇 as well as what else you would like to see, or know more about?
#readlabels #readfoodlabels #guargum #guthealth #guthealing #inflammationrelief #antiimflammatory

Easy buckwheat porridge. If you’re looking to switch up your morning bowl of oats, then give buckwheat a try. It has a chewy texture and mild flavor, that pairs with just about anything.
Comment ‘easy buckwheat’ and I’ll send you the recipe.
This buckwheat porridge is SO EASY to make, and is naturally gluten-free, dairy-free, and vegan to boot, and the bonus is it takes under 15 minutes to whip up in the morning.
This breakfast is hubby approved. Steve tried this the other day and kept saying, “this is the best breakfast,” “man, this is SO good.” So if I can get my mountain biking, carb loving hubby to happily eat of bowl of this, then I think your family might love this too.
I love topping mine with blueberries, @socotahini and bee pollen!
#buckwheat #buckwheatporridge #buckwheatrecipes #porridgebowl #porridge #porridgelover #breakfastideas #breakfast #healthybreakfast #healthybreakfastclub #healthybreakfastideas

Rosemary & thyme turkey burgers. These are not your typical dry turkey burgers. The rosemary and thyme paired with the sautéed red onion give these burgers a pop of flavor, and the Dijon and avocado oil pump up the moisture. These burgers are also gluten-free and dairy-free.
Comment ‘turkey burger’ and I’ll DM you the recipe link.
I love topping these burgers on a big green salad and pairing them with my oven roasted sweet potato fries. Delish! #turkeyburger #turkeyburgers #burger #dairyfreeglutenfree #burgers #healthyfood

These vegan Mexican quinoa bowls have become a weekly staple in our house. They’re naturally vegan, but are full of flavor from the avocado tahini, and spicy chipotle tahini sauce.
Comment ‘vegan bowl’ and I’ll DM you the recipe.
These bowls are also great for those that are on the candida diet.
I ❤️ these bowls because they’re jam packed with plant protein, as quinoa is a complete protein, and beans when paired with the quinoa, make a complete protein too. This bowl is balanced and satisfying from the slow burning carbs, healthy fats, plant protein, and will honestly sustain you for hours.
These bowls are a great weeknight meatless dinner option, as I typically make the sauces ahead of time, (they literally take 5 minutes) so when it comes to dinner time, all I have to do is make the quinoa (takes under 20 minutes) and roast the sweet potatoes. I hope you give these a try, and that they become a go-to meatless dinner.
#candidadiet #candidacleanse #veganbowls #veganbowls #veganrecipes #veganrecipe #vegandinner #vegandinnerideas #healthyfood

Here’s the perfect snack for those of you trying to cut back on refined sugar. These healthy no bake cacao oat bars are super addicting, once you have a bite, you just can’t stop.
Comment ‘oat bars’ and I’ll DM you the recipe.
The great thing is you don’t have to feel guilty, as these are made with pretty healthy ingredients and are GF, DF and refined sugar free. I love having these on hand for that afternoon, or post lunch craving. They hit the spot perfectly. #healthy #healthysnacks #healthysnackideas #healthysnack #refinedsugarfree #norefinedsugar #healthydesserts #healthydessert #healthydessertrecipes #healthysnackrecipes





Def gonna try these!
I hope you and the gang love them girl!!! 🙂
What’s the oven temperature and where do you position the rack for these fries ?
Hi Bruce! The oven temperature is 450 degrees and I usually position my rack in the center of the oven for all of my roasting, so third rack. I hope that helps! xoxo, Jacquelyn
I love sweet potato fries. Yours are thicker than I’ve ever made mine but I want to try them this way! Looks super delicious.
Yum! I have sweet potatoes wrapped in tinfoil ready to be baked, but I think I’ll try this recipe instead! Dinner tonight will be baked Orange Roughy, sweet potato fries and roasted asparagus!!!
Hi Nicole! Yum! What’s baked Orange Roughy? It sounds interesting! Just a heads up, I wouldn’t bake the sweet potatoes on tin foil, as it tends to burn them, so just use a plain old baking sheet. Also, parchment paper makes them soggy! I should add that to the post! I hope you and your crew enjoys these! Have a great Monday! xoxo, Jacquelyn
Orange Roughy is a salt water fish. My favorite is flounder, and I also like orange roughy because it is similar. I grew up on the Gulf coast of Florida and orange roughy can be caught there, as well as flounder. I know it’s been two years since these comments, but I hope this helps. Thanks for your recipe!
i like how you made them thicker and not thin. The problem I have with sweet potato fries sometimes is they don’t hold up as well being thin as regular potatoes- yet for some reason I have never thought to make them thicker. LOVE IT!
A little tip I figured out some time ago. I do similar to both sweet and white potatoes. The difference with my routine is that I get a crispy outside similar to deep frying. Start out the same as you describe. For a big batch for two people, I use a teaspoon or two of your favorite veggie oil. That’s all it takes for 2-3 medium spuds. I prefer fresh peanut or coconut oil. The MCTs in coconut are important to me. If you use coconut, the spuds must be at room temp and the oil warmed to properly coat. Yes, you can use olive, but it adds a strange flavor to me. I just flip the spuds and oil in a larger bowl. Here’s the important difference. I use a 9 X 12 steel cake pan with a footed wire cooling rack on top. Lay the coated and salted fries on the cooling rack. It’s not even critical that they are not overlapping a bit. The key is to place the pan/rack/ and fries into a convection oven pre-warmed to about 375 F. They fries cook in about 20-25 minutes. Why it so effective is the the hot air circulates around the fries and cooks and crisps all sides of the fries without burning them. The middle remains soft and fluffy. Set the cooked fries on a paper plate after cooking. Virtually no oil stains. My method is the forerunner of the air fryers now growing popular. It’s perhaps more effective and more cost efficient. Try dry coated (I like Dixie Fry) chicken this way. It’s amazing. Crisp and juicy!
Wow Phil! Thanks for the very detailed tip. I’m totally going to give that a try! My readers will appreciate your tip as well, as I know there are people out there that want crispy fries 🙂 xoxo, Jacquelyn
I’ve been on the PALEO diet for over a year now. I lost 35# during the first 6 months and keeping it off. I’m going to do the Sweet Potato Fries and some Kale recopies. Thank you for your site!
They’re tasty but I don’t think frying is a good option. They are too soft.