Roasted Whole Beets without Foil
You’ve all heard me talk about how aluminum foil is a big “NO, NO“ when it comes to cooking, and if not, then I’m here to remind you again. Aluminum foil is a big “NO, NO” (sorry Reynolds) because it leaches aluminum into your food, so don’t roast or bake your veggies and meat on foil, use parchment paper instead!
Also, most commercial baking sheets (I think all of them actually) are made of heavy-duty aluminum, which like aluminum foil will leach into your food, so always line your rimmed baking sheets/sheet pans with parchment paper. For instance, if you’re roasting up sweet potato fries, cookies, chicken breasts or broccoli make sure to put a layer of parchment paper between the food and the baking sheet. The parchment paper prevents the aluminum from leaching into your food, so it’s basically a barrier.
The parchment paper I use and love is, If You Care, unbleached parchment paper. You can find it at Amazon and in most Whole Food stores.
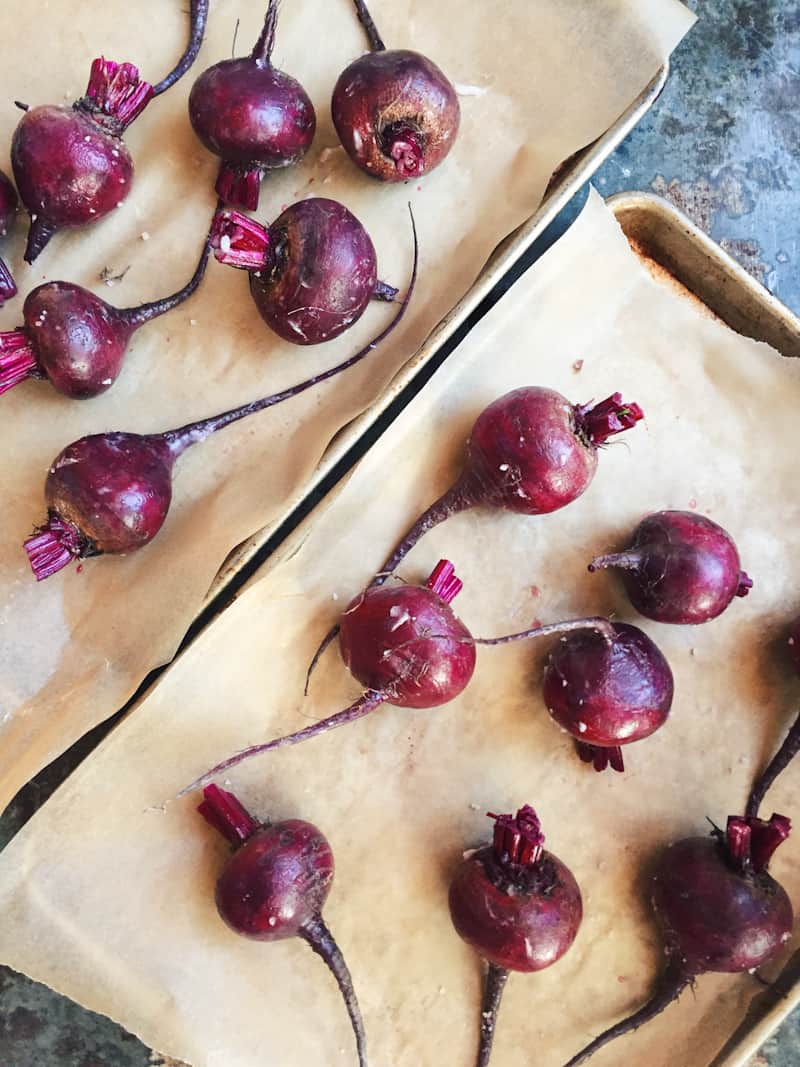
So let’s get back to roasting whole beets. Today I’m going to show you how to roast whole beets without foil. Most recipes call for you to roast whole beets by wrapping them in a foil packet. That’s great, but now knowing what we know about foil, who wants to cook their beets up that way? Not me! I found an even easier and less wasteful technique, where the beets come out perfect, flavorful and tender every time, and that is to just put the whole beets on a layer of parchment paper, and roast them away. Easy peasy!
Nutritional benefits of beets:
- High in immune-boosting vitamin C.
- High in fiber.
- High in essential minerals like potassium (essential for healthy nerve and muscle function).
- High in manganese (which is good for your bones, liver, kidneys, and pancreas).
- Contain the B vitamin folate, which helps reduce the risk of birth defects.
- They’re great for the liver, as they stimulate the liver’s detoxifying processes.
- The pigment (betacyanin) in beets is a powerful anti-cancer fighting agent and that paired with the high fiber content of beets help protect against colon cancer.
- Rich in carotenoids, which may help boot brain functioning and stave off depression.
You can do so much with roasted beets. Make a batch on Sunday, and you’ll have cooked beets all week to add to just about anything, as cooked beets last 5 days.
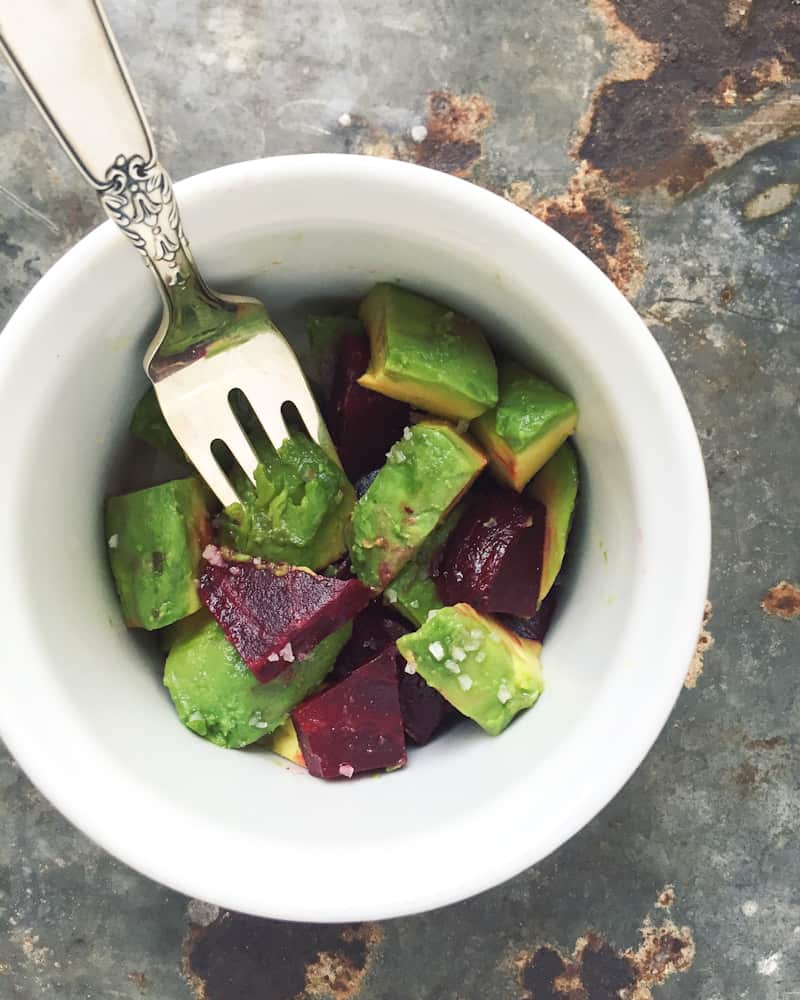
I love cooked beets paired with diced avocado and Celtic sea salt for a quick, easy and healthy post-work out snack, this also makes a great healthy side dish. The beets give me potassium, the sea salt replenishes the salts my body lost during my workout, and the avocado is just chock full of healthy fats. All good stuff, and way better than reaching for a carb or cookie.
I love tossing roasted beets in a salad, such as this roasted beet salad with arugula and toasted and salted almonds. Zoe made up the balsamic vinaigrette recipe for this salad! It’s so darn good, and so easy to whip up!
Roasted beets are a great side dish just on their own! I packed Zoe some roasted beets for her lunch the other day, and this was the text I received from her, “hi mom, the beets were super yummy. The way you cooked them was awesome!” So there you go, my 16-year-old loves roasted beets! Eli on the other hand, will eat them, but they’re not his favorite thing..

Roasted Whole Beets Without Foil
prep time: 5 minutes | cook time: 40-60 minutes – cooking time varies depending on the size of your beets
- whole beets, as many as you want to cook up – I usually cook up 4 at a time, as once roasted, they last a week in the fridge
- coconut oil, or avocado oil
- Celtic sea salt
- Parchment paper
Pretty simple list of ingredients, but hey, we’re just roasting up some beets, so we don’t need too much! Simple and easy is always good in my book.
This roasting method works for any kind, color and sized beet, but smaller to medium-sized beets take less time to roast, and usually taste better.
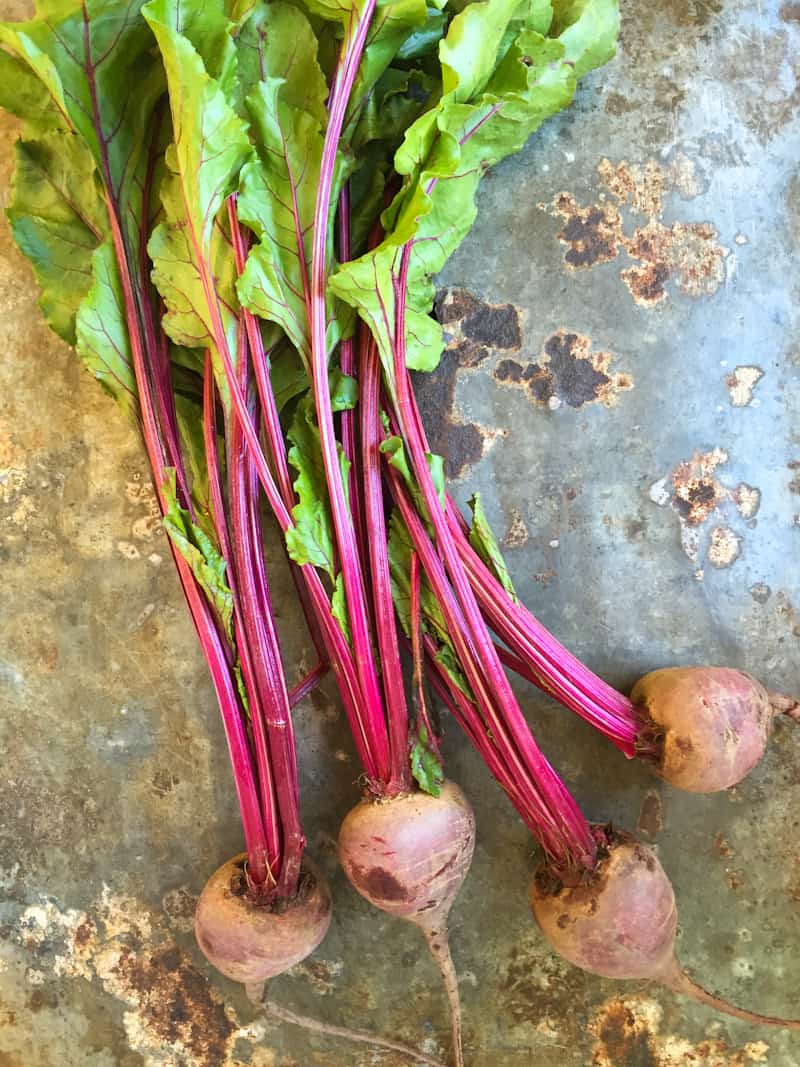
Selecting beets: Pick beets that feel firm and hard in your hand, never soft or squishy, with smooth skins and no noticeable bruising. If you have the choice, pick bunches with their greens still attached and reserve for the greens for another use or recipe. You can enjoy the greens by themselves massaged or tossed in a salad or with other leafy greens, or sauté them in a bit of olive oil or balsamic vinegar and salt, blanch them and toss them in a pasta. You can also freeze them and use them for soup stock. If the beets have been trimmed, then look for beets with at least 2 inches of stem still attached.
Storing fresh beets: If you purchase beets with the greens attached, try and cut the greens from the beets as soon as you get home, leaving 1 to 2 inches of stem attached. You can leave the beets on the counter at room temperature (if it’s cool) for a few days, if not using them right away, or store them in the fridge for up to 10 days. Be sure to use the beet greens within a day or two, as they don’t keep well. You can wash and use them day 1, or store them unwashed in the refrigerator in a plastic bag for a day.
When you’re ready to roast the beets, slice off the beet leaves close to the tip of the beet, leaving yourself enough to grip.
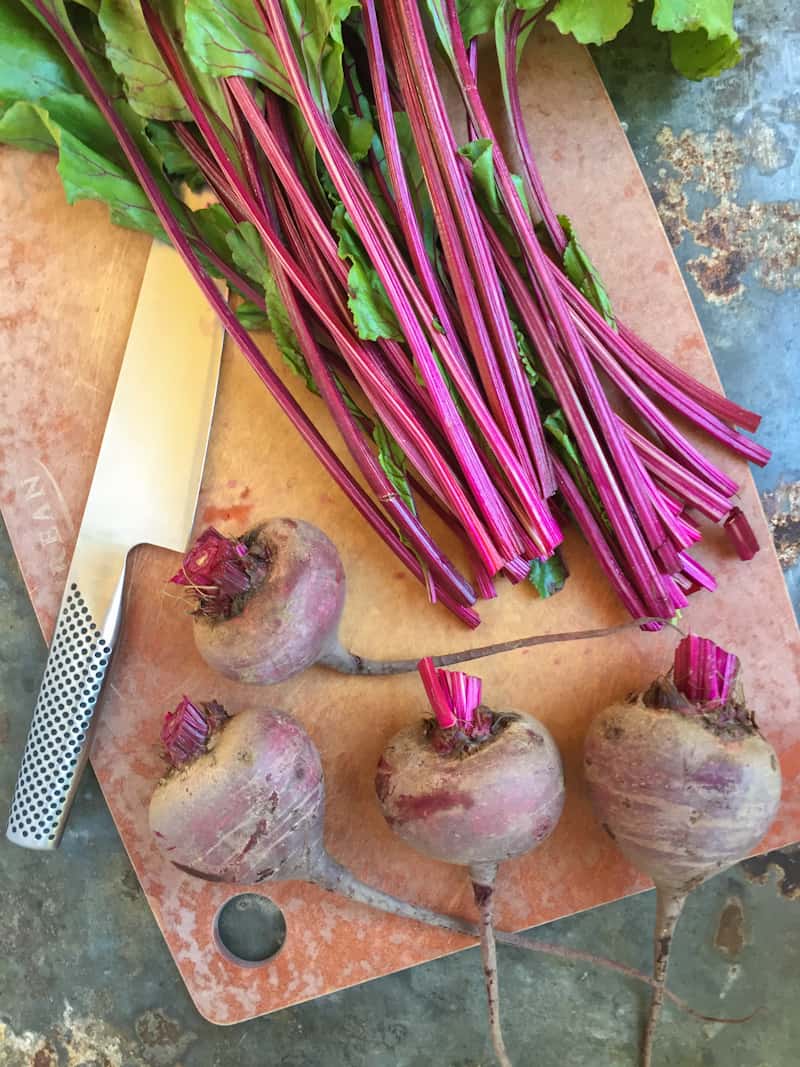
Pre-heat oven to 400 degrees. Get out a large rimmed baking sheet and line it with parchment paper.
Rinse and scrub the beets under cool water, using a vegetable brush to get off any caked on dirt. Don’t scrub the beets too hard, as you don’t want to damage the skin.
Rub each beet with a bit of coconut oil. The coconut oil doesn’t need to be melted, just grab a bit from the container and rub it over each beet. Sprinkle each beet with a bit of sea salt. That’s it, see how easy it is to prepare the beets for roasting?
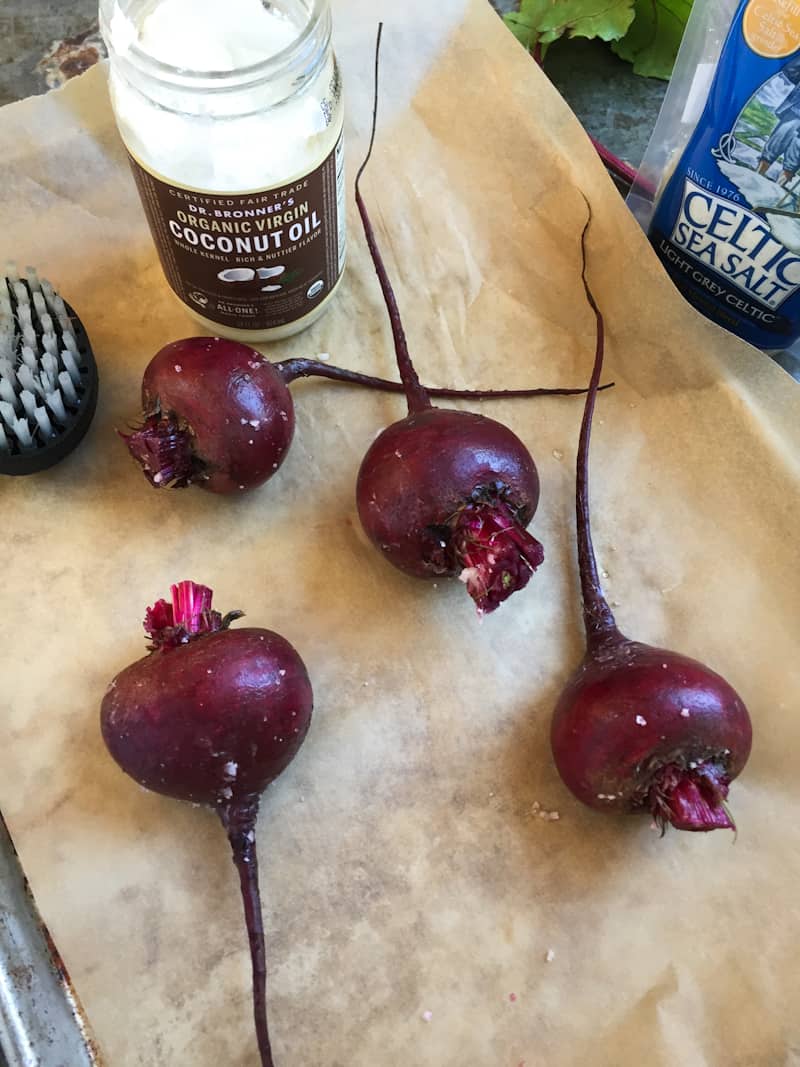
Roast the beets until a knife, fork or skewer slides easily to the middle of the beet, anywhere between 40 to 60 minutes. Roasting time varies depending on the size of the beets. If your beets are larger, they will obviously take longer.
I would check the beets at 40 minutes, and if a knife goes easily and smoothly through the center of the beet, then they’re ready. If not, roast another 10 minutes and test again. Continue to roast and test until they’re ready.
As you can see, the skin will darken up in color and get a bit wrinkled.
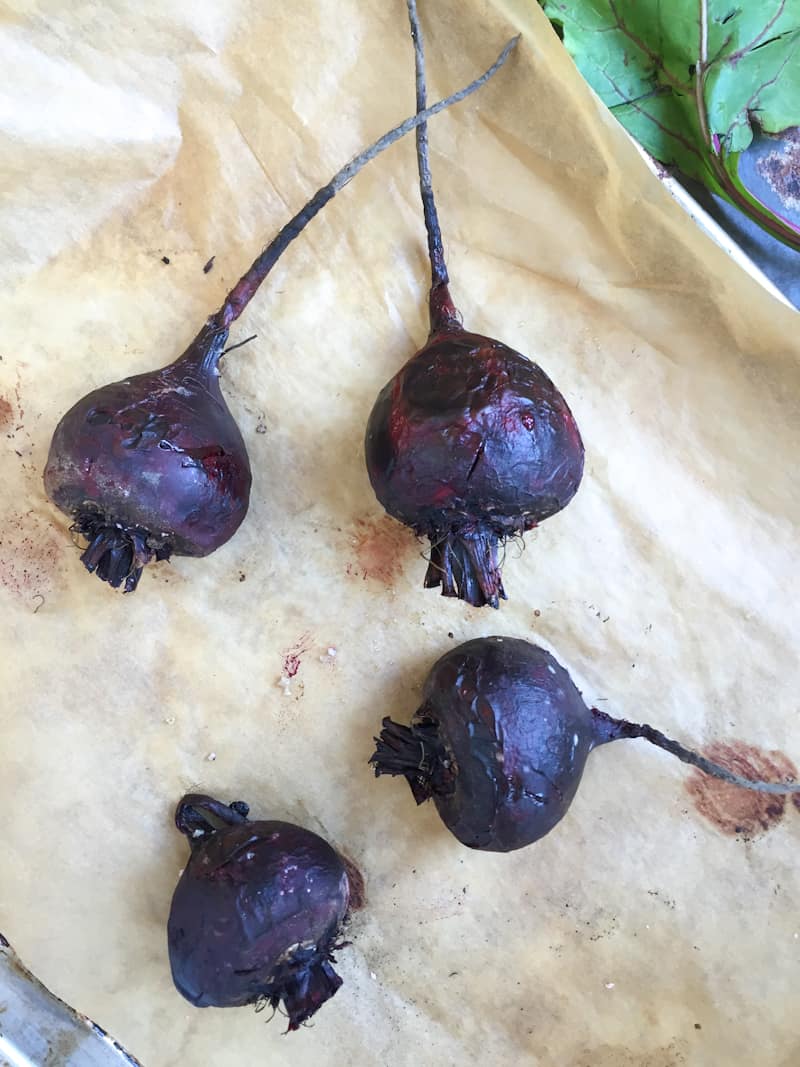
Let the beets cool, about 5-10 minutes. Once the beets are cool enough to handle, cut off the beet stems and the tails.
Peel the beets by pulling off the skin off with your hands, or by holding the beet in a paper towel and using the edges of the paper towel to rub the skin away. I always just use my hands, and yes, they turn red, but the redness washes away after a few hand washes. You can also peel them under cool running water with your hands! You can also choose to leave the skin on as it’s perfectly edible, but I prefer to peel my beets.
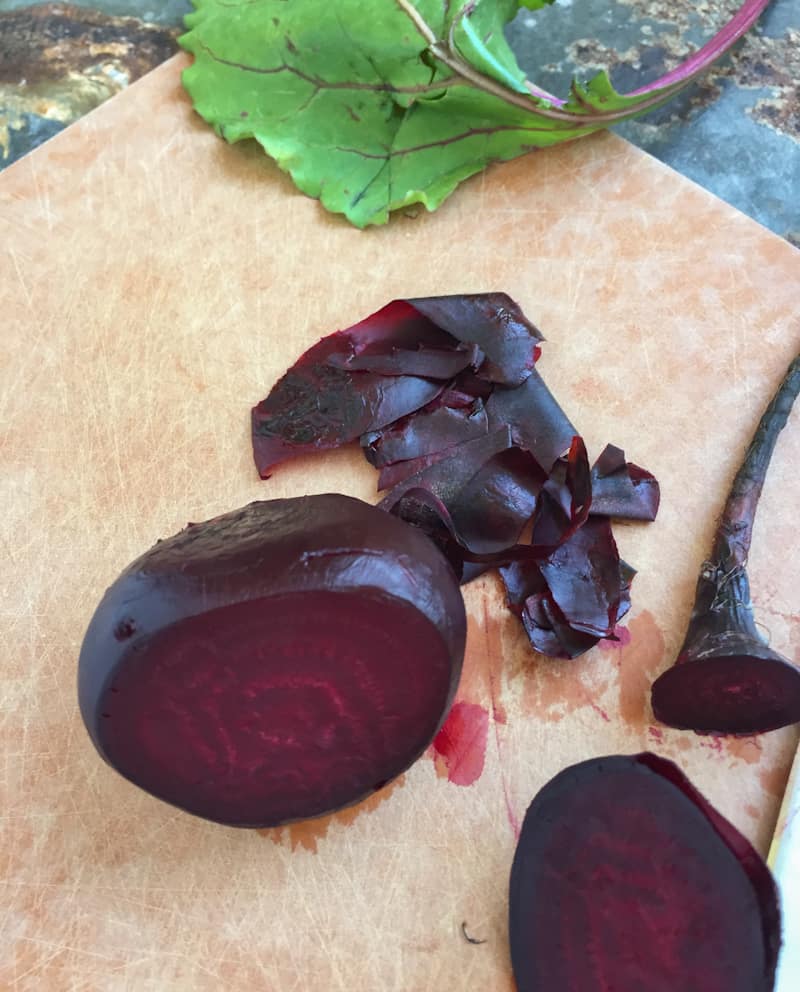
Storing cooked beets: Once roasted, beets will keep refrigerated for up to a week. You can store them whole or sliced. I store them whole in a glass container with a lid, and slice off just what I need for whatever I’m making.
You can use roasted beets in just about anything. I love them paired with diced avocado for a quick snack. Toss them in your favorite salad, pasta dish, or top them on a pizza.
If you like beets, then try my roasted matchstick beets with coconut oil. These matchstick beets are the perfect vegan or gluten-free crouton to add to salads or soups, and take just 12 minutes to roast up.
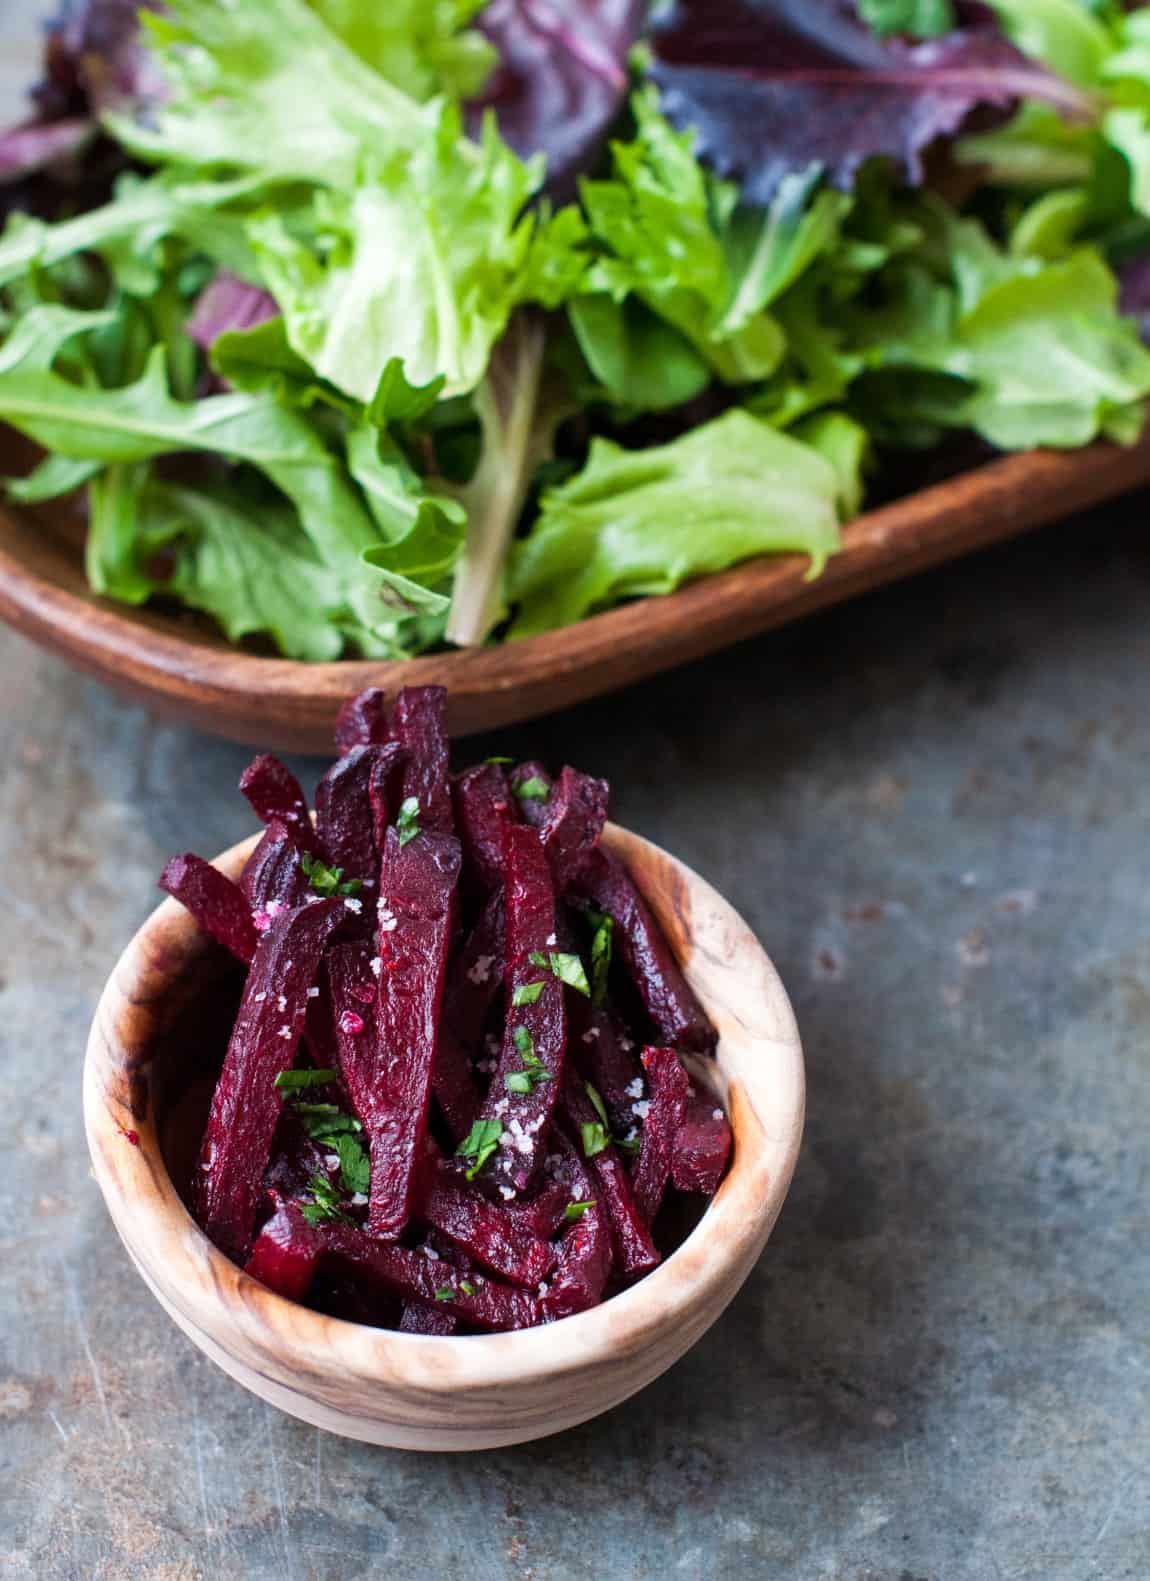
The matchstick beets taste amazing on my beet ginger and coconut soup.
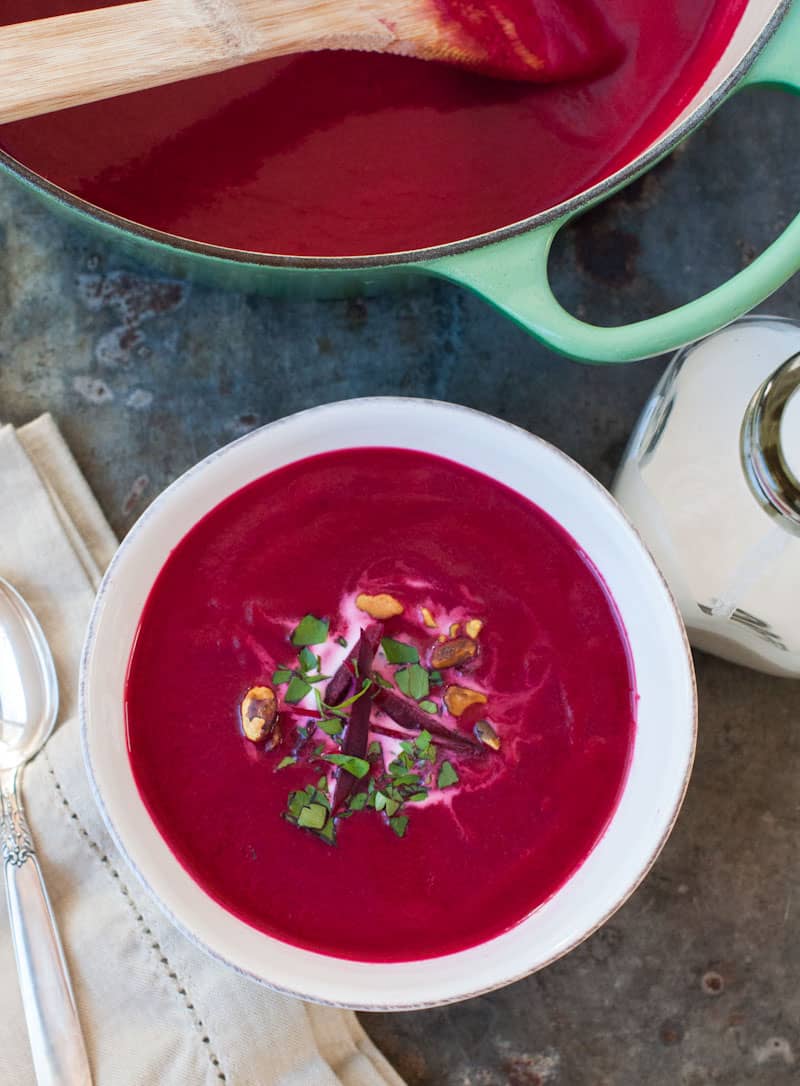
Up next I’m posting the recipe for this super simple weeknight salad of roasted beets, arugula and toasted salted almonds tossed in a balsamic vinaigrette! Delish!

Roasted Whole Beets without Foil
5
minutes40-60
minutesCooking time varies depending on the size of your beets.
Ingredients
Whole beets, as many as you want to cook up - I usually cook up 4 at a time, as once roasted, they last a week in the fridge
Parchment paper
Directions
Pre-heat oven to 400 degrees. Get out a large rimmed baking sheet and line it with parchment paper.
Slice off the beet leaves close to the tip of the beet, leaving yourself enough to grip.
Rinse and scrub the beets under cool water, using a vegetable brush to get off any caked on dirt. Don't scrub the beets too hard, as you don't want to damage the skin.
Rub each beet with a bit of coconut oil. The coconut oil doesn't need to be melted, just grab a bit from the container and rub it over each beet. Sprinkle each beet with a bit of sea salt. That's it, see how easy it is to prepare the beets for roasting?
Roast the beets until a knife or skewer slides easily to the middle of the beet, anywhere between 40 to 60 minutes. Roasting time varies depending on the size of the beets. I would check the beets at 40 minutes, and if a knife goes easily and smoothly through the center of the beet, then they’re ready. If not, roast another 10 minutes and test again. Continue to roast and test until they're ready.
Let the beets cool, about 5-10 minutes. Once the beets are cool enough to handle, cut off the beet stems and the tails.
Peel the beets by pulling off the skin off with your hands, or by holding the beet in a paper towel and using the edges of the paper towel to rub the skin away. I always just use my hands, and yes, they turn red, but the redness washes away after a few hand washes. You can also peel them under cool running water with your hands! You can also choose to leave the skin on as it's perfectly edible, but I prefer to peel my beets.
Storing roasted beets: Once roasted, beets will keep refrigerated for up to a week. You can store them whole or sliced. I store them whole in a glass container with a lid, and slice off just what I need for whatever I'm making.
Notes
- Selecting beets: Pick beets that feel firm and hard in your hand, never soft or squishy, with smooth skins and no noticeable bruising. If you have the choice, pick bunches with their greens still attached and reserve for the greens for another use or recipe. You can enjoy the greens by themselves massaged or tossed in a salad or with other leafy greens, or sauté them in a bit of olive oil or balsamic vinegar and salt, blanch them and toss them in a pasta. You can also freeze them and use them for soup stock. If the beets have been trimmed, then look for beets with at least 2 inches of stem still attached.
- Storing fresh beets: If you purchase beets with the greens attached, try and cut the greens from the beets as soon as you get home, leaving 1 to 2 inches of stem attached. You can leave the beets on the counter at room temperature (if it's cool) for a few days, if not using them right away, or store them in the fridge for up to 10 days. Be sure to use the beet greens within a day or two, as they don't keep well. You can wash and use them day 1, or store them unwashed in the refrigerator in a plastic bag for a day.
Did you make this recipe?
Tag @marinmamacooks on Instagram and hashtag it #MarinMamaCooks
Like this recipe?
Follow us @marinmama on Pinterest
Did you make this recipe?
Follow us on Facebook
Nourish your inbox!
Dairy free green goddess dressing. This is my dairy free, vegan take on a green goddess dressing. I wanted to create a tasty dairy free version, while focusing on keeping the ingredients ultra clean, so I used a coconut based yogurt @cocojune_organic that doesn’t contain gums, or other ingredients you can’t pronounce.
Comment “green” and I’ll DM you the recipe link.
The result, we love this dressing and have been making it on repeat. I love how creamy and vibrant this dressing is and how it coats each piece of lettuce. I also love how interchangeable the herbs are. You can truly use what you have on hand.
This dressing isn’t just for salads, you can use as a dip for veggies, sweet potato fries, or drizzle over grilled or roasted chicken. The possibilities are endless. 💕
#greengoddessdressing #greengoddesssalad #greengoddess #healthyfood #saladdressing #dairyfreesalad #dairyfreerecipes #vegandressing #vegansalad #salad #healthysalad #healthysalads

I want to share with you guys a simple lesson about reading ingredients. Here’s my favorite brand of coconut milk, Native Forest. As you can see, they have 2 kinds of the full fat unsweetened coconut milk, one is called simple, and one is classic. The difference here is in the ingredients, one contains guar gum and one doesn’t.
You really want to look at the labels and the ingredients, and not just trust the brand is the same across all products.
I love this Native Forest, Simple, because again it clearly states no quars, and if you look in the ingredients, you’ll see organic coconut milk, organic coconut, filtered water. Simple whole food ingredients, no added fillers, gums, or flavors. You always want to look for a BPA free cans and the USDA organic stamp, which means its certified organic, so there’s no GMO’s, pesticides etc.
What is guar gum, and why is it bad?
Guar gum, which is derived from the guar bean is a thickening agent that can wreak havoc on your digestive system by causing bloating, gas, and discomfort. It can disrupt the delicate balance of your gut microbiome, leading to inflammation and impaired nutrient absorption. It’s also seen a lot in non-dairy creamers or milks.
Was this helpful? If so, let me know in the comments below, 👇 as well as what else you would like to see, or know more about?
#readlabels #readfoodlabels #guargum #guthealth #guthealing #inflammationrelief #antiimflammatory

Easy buckwheat porridge. If you’re looking to switch up your morning bowl of oats, then give buckwheat a try. It has a chewy texture and mild flavor, that pairs with just about anything.
Comment ‘easy buckwheat’ and I’ll send you the recipe.
This buckwheat porridge is SO EASY to make, and is naturally gluten-free, dairy-free, and vegan to boot, and the bonus is it takes under 15 minutes to whip up in the morning.
This breakfast is hubby approved. Steve tried this the other day and kept saying, “this is the best breakfast,” “man, this is SO good.” So if I can get my mountain biking, carb loving hubby to happily eat of bowl of this, then I think your family might love this too.
I love topping mine with blueberries, @socotahini and bee pollen!
#buckwheat #buckwheatporridge #buckwheatrecipes #porridgebowl #porridge #porridgelover #breakfastideas #breakfast #healthybreakfast #healthybreakfastclub #healthybreakfastideas

Rosemary & thyme turkey burgers. These are not your typical dry turkey burgers. The rosemary and thyme paired with the sautéed red onion give these burgers a pop of flavor, and the Dijon and avocado oil pump up the moisture. These burgers are also gluten-free and dairy-free.
Comment ‘turkey burger’ and I’ll DM you the recipe link.
I love topping these burgers on a big green salad and pairing them with my oven roasted sweet potato fries. Delish! #turkeyburger #turkeyburgers #burger #dairyfreeglutenfree #burgers #healthyfood

These vegan Mexican quinoa bowls have become a weekly staple in our house. They’re naturally vegan, but are full of flavor from the avocado tahini, and spicy chipotle tahini sauce.
Comment ‘vegan bowl’ and I’ll DM you the recipe.
These bowls are also great for those that are on the candida diet.
I ❤️ these bowls because they’re jam packed with plant protein, as quinoa is a complete protein, and beans when paired with the quinoa, make a complete protein too. This bowl is balanced and satisfying from the slow burning carbs, healthy fats, plant protein, and will honestly sustain you for hours.
These bowls are a great weeknight meatless dinner option, as I typically make the sauces ahead of time, (they literally take 5 minutes) so when it comes to dinner time, all I have to do is make the quinoa (takes under 20 minutes) and roast the sweet potatoes. I hope you give these a try, and that they become a go-to meatless dinner.
#candidadiet #candidacleanse #veganbowls #veganbowls #veganrecipes #veganrecipe #vegandinner #vegandinnerideas #healthyfood

Here’s the perfect snack for those of you trying to cut back on refined sugar. These healthy no bake cacao oat bars are super addicting, once you have a bite, you just can’t stop.
Comment ‘oat bars’ and I’ll DM you the recipe.
The great thing is you don’t have to feel guilty, as these are made with pretty healthy ingredients and are GF, DF and refined sugar free. I love having these on hand for that afternoon, or post lunch craving. They hit the spot perfectly. #healthy #healthysnacks #healthysnackideas #healthysnack #refinedsugarfree #norefinedsugar #healthydesserts #healthydessert #healthydessertrecipes #healthysnackrecipes






Such great information, as always! Thank you!
Found you and your method of roasting beets on parchment paper rubbed with coconut oil and salt. Wow! I love this method for cooking fresh, organic beets. Saved the top greens for a sauté. They were so sweet, that I even enjoyed eating them with the roasted skin. Thank you!
Hi Jacqueline, wow – thank you for the info. I am starting to get more into using parchment paper but definitely still use lots of foil. I only know how to make foil beets. Your method cooking the beets whole on the parchment looks way easier and better for us. Much appreciated and going to try this soon. cheers, Bita
Just found out that the Nordic Ware popover pan we both use is made of cast aluminum, not cast iron. Do you know if that is safe to use?
Oh no! I will have to look into that ASAP. I know that I won’t stop making popovers though, as they’re one of our favorite things! You’ve got to balance the good with the bad and do what you can, right? I mean if you can cut out foil and then line baking sheets with parchment most of the time, then you’re already ahead of the game, and thus have to balance the rest out. I mean you can’t get away from everything! Thanks for letting me know and I will look into it and see if I can find anything out!
xoxo, Jacquelyn
Loved this post!! TY for posting!! We LOVE beets! Have you posted that yummy arugula and beet salad yet?? I can’t wait to try that!
Hi Fran! Yay! So glad you loved this post! I’m actually going to post the arugula salad later tonight or tomorrow morning! Keep a lookout for it! I hope you love it 🙂 xoxo, Jacquelyn
Can I ask- why do we even need the parchment paper? Could we just do on the pan with oil, sans paper?
I use the parchment paper because aluminum has been known to leach into food, and most baking sheets are made with aluminum, so I use parchment paper as a barrier. It’s a bit crazy I guess, but it’s something I learned in natural chef school, so I just take that extra precaution, so yes you can totally just roast them on the regular old baking sheet if you want 🙂
Hi Marin,
I looked around for roasted beets recipe and was so happy to find yours! I roasted whole beets as you suggested but used Calphalon baking dish after checking that it was stainless steel. I don’t know if you are aware of this. The beets came out really yummy. Thank you so much.
Do you have a recipe for the fresh tops that I just cut off my organic beets?
My father died with Alzheimer’s disease (he worked at Reynolds) in the early 80’s so I’ve known about aluminum for a long time. It’s nice to see people cooking without it. Thank You!
Hi Lizzie! So sorry to hear about your father. Yes, there’s a lot we don’t hear about or know, but I’m slowly trying to spread the word. Small changes can make a difference. xoxo, Jackie
Hello….I publish a local newspaper for the Gatlinburg guests and community. It would be great if you could be a contributing writer. We will of course tag your website, etc on the column. I just lost one of my writers due to illness. She wrote about the same type of things you write about. Her name is Teri Pizza. You can check out my newspaper at http://www.smokymountainsarounstown.com. We are a monthly newspaper. Would love to hear from you. Thank You, Liz
Hi Lizzie! Wow, thanks so much for reaching out. I would love to be a contributor to your publication, but unfortunately at this time, I’m working a full-time job that requires tons of travel and I can barely keep my blog updated. I just had to quit my monthly food column for the local paper because it was too much to juggle. I do hope your writer feels better soon, sending some vibrational white light her way. Again, thanks so much for reaching out, I truly appreciate it and would totally take you up on your offer if I was working on my blog full-time. xoxo, Jackie
I’ve never been able to roast beets for an hour, is more often 90 minutes or more. The ones I use aren’t huge, so I’ve no idea what I’m doing wrong!
Hi Mary,
It could be your oven or the size of your beets, there isn’t an exact science or cooking time, but 1 hour give or take is usually enough time for most beets to roast. Don’t worry so much about the time, just roast them when you have time to be at home, so if they take longer it’s ok!
I am with you when it comes to avoiding aluminum foil for cooking. I use it only to cover cooked items (with parchment paper under it) that will be “traveling” (such as to holiday dinners at family &/or friends’ homes or barbecues & parties…) as I will NOT use Saran/plastic wrap, ever. Never ever!!! That being said; do people forget about the awesome, olde-timey cast iron pots, pans, griddles & whatnot??? I use my cast iron items for all sorts of baking & always get fine results. Recently, Mr. thought he was doing me a solid by putting our oven on a self cleaning mode, I call him “Mr. Helpful” when her does these sorts of dumb things) without looking to see if anything was in the oven & my 55 yr old (t’was a wedding gift to my Ma in 1962) skillet got “cleaned” too. 🙁 However, as I’ve been using it for all sorts of baking lately so the “life” is returning to it. Huzzah! I love my Lodge cast iron items but this skillet is older than I am & I swear it has “magical” properties (anyone who eats my cinnamon rolls cooked in it can attest to this). I haven’t ever made my own roasted beets & just harvested 3 from my garden & they are frickin’ GINORMOUS & was glad to come across your site. I don’t use coconut oil, but as I get organic peanut oil from a friend in Georgia & have roughly 5 gallons of it, I’m going to use it & hope the results are as good. Finger, toes & eyes crossed…
Can I use olive oil instead of the coconut one?
Finally a roasted beets recipe without using foil! Thank you!
Welcome 🙂
I love fresh beets! But amazingly they are difficult to find in France – for some reason beets come pre-cooked here, which is good in a way, but sometimes I just want to cook them myself. But they are available in the fresh food aisles year round – the French love beets in their salads. Here are a couple of ways I also love them besides with wonderful Brittany butter with sea salt crystals just plain – OMG the butter here is to die for, never tasted anything like this except maybe some of the Amish butter. My dad was part Scottish and he loved “Plaid” cook beets, carrots and potato – I have used sweet potato and squash even. Once cooked toss with butter, salt and pepper – on the plates he would then use his fork and sort of mash the veggies together – creating “Plaid” – colorful, nutritious and yummy. Then with, make sure you cook extra, cut all the leftovers into cubes just like you would for potato salad – I often added peas as well and sometimes some walnuts – I like making all kinds of neat mayo dressings, with some fresh herbs, seasonings, lime etc. toss just like potato salad, the beets will turn everything pink and you will have Plaid Salad – my kids loved this when they were little – they always wanted “pink” potato salad.
A lot of the exact same wording appears here:
https://www.thekitchn.com/how-to-roast-beets-in-the-oven-cooking-lessons-from-the-kitchn-172827#comments-172827
Looks like somebody copied somebody, and it looks like your page is the older of the two.
The link you sent started 2012.
Hi Elene, Thanks for the heads up, but to be honest, sharing is caring! I learned this method in natural chef school, so its a method that is used quite often.
Thanks so much for your parchment paper recipe. I was browsing recipes for roasting beets and was dismayed to see foil foil everywhere. I was going to use parchment anyway but wasn’t sure if I should wrap the beets with it. I’ve been using the same paper you do and just love it. I’m always amazed how long the roll lasts! As I enjoy your healthier version, I’ll be thinking of you.
Thanks Janice! I hope it worked out for you! Parchment paper is the best, and I always make sure I have an extra roll on tap so I never run out. I also love that its compostable!
If you have very fresh beets (as in, picked from the garden 15 minutes prior to cleaning and sticking in the oven), do NOT use this method–it will not work I am currently stuck very carefully peeling already cooked beets with a super sharp knife to try to save as much actual beet as possible. And I was so excited that I might save some time..
Hi Amie, Oh my gosh, I’m so sorry to hear that this method ended up ruining your beets 🙁 I’m so sorry! I’ve only done this method with beets from the grocery, as I don’t have a green thumb, and it’s worked great for me. Sometimes it can be tricky to get the skin off, but I make sure to let them cool down enough. You can also try using a vegetable peeler if you find the skin is sticking. If you come across a better way to roast your beets, let me know! I would love to hear other people’s tips and tricks! xoxo, Jackie
The information provided is really great and would like to share it with others.
Found you and your method of roasting beets on parchment paper rubbed with coconut oil and salt. Wow! I love this method for cooking fresh, organic beets. Saved the top greens for a sauté. They were so sweet, that I even enjoyed eating them with the roasted skin. Thank you!