- Chicken | dinner | gluten-free | Mexican | Tacos
Chicken Enchiladas with Tomatillo Salsa
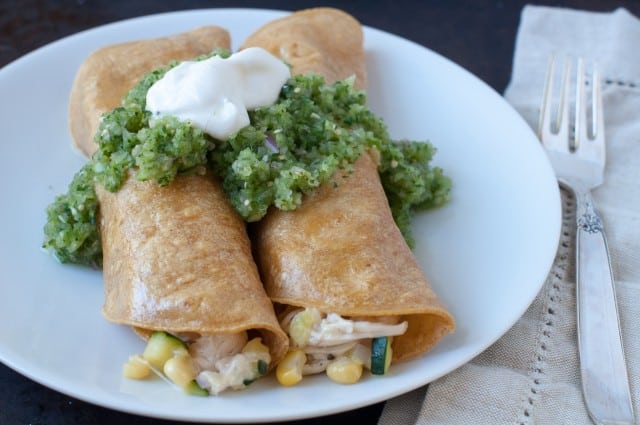
I’m so excited to share these enchiladas with you. I made these up last week and my family LOVED them. I mean John kept exclaiming to me how good they were. These are truly the perfect spring or summer enchilada, because they’re filled with chicken and fresh vegetables and topped with a light tomatillo salsa. The tomatillo salsa is a light and refreshing change from the normal heavy enchilada sauce that you think of when you hear the word enchiladas. Don’t get me wrong, I love a good enchilada sauce, especially the pumpkin sauce I use on our pumpkin enchiladas, but this is a nice change and flavor for spring. These enchiladias are so light and refreshing that we each ate two! Yes, we were piggies, but we didn’t feel bad at all. Sometimes you just have to savor the moment and savor the food.
I chose to roast up chicken breasts instead of using a rotisserie chicken because we’re not fans of dark meat, but feel free to use a rotisserie chicken. To make these enchiladas an easy weeknight meal, all you have to do is pre-cook and shred the chicken (or just use a rotisserie chicken) and make the salsa ahead of time. Then come dinner time, all you have to do is sauté a few veggies, assemble the enchiladas, and throw them in the oven for 10 minutes. At that point you truly have a 30 minute meal. Easy peasy, right? You could even substitute the tomatillo salsa with a store bought mild green salsa if you wanted, though I really think this salsa is the bomb! I actually roast and shred the chicken the night before or earlier that day and then make the salsa while the chicken is roasting. That way I take care of two components of the meal. Hey, I’m always looking to cut time at dinner as well. Please don’t be intimidated by all the ingredients or instructions below, these are truly a simple enchilada to throw together.
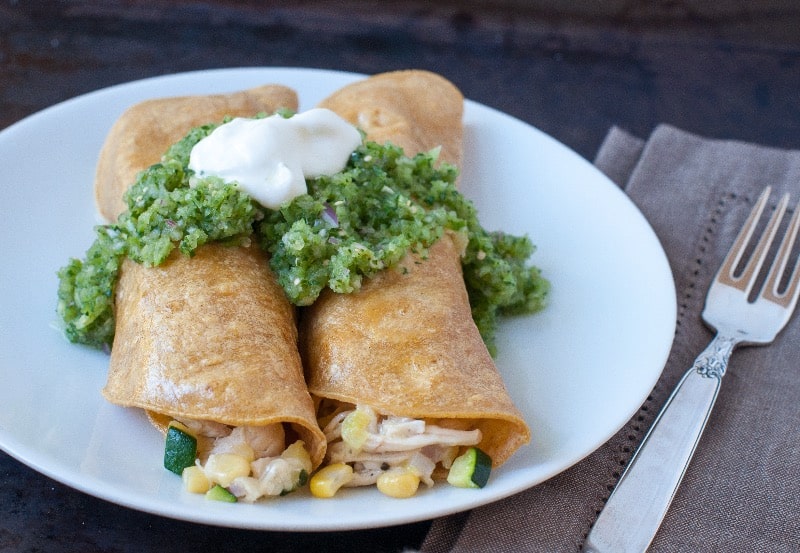
chicken enchiladas with tomatillo salsa:
Recipe adapted from Real Simple Best Recipes: Easy, Delicious MealsReal Simple
Serves 4-6
Note: You only need 1 red onion here, you will use 1/2 for the enchiladas and 1/2 for the salsa
- 2 bone-in skin on chicken breasts or 1 2-to 2 1/2-pound rotisserie chicken, meat shredded
- splash of olive oil
- 4 tablespoons safflower or canola oil – You can really use any high-heat neutral oil of choice here
- 2 small zucchini, diced
- 1/2 of a normal sized red onion, diced
- 1/2 cup corn kernels (from 1 ear, or frozen and thawed) – I used frozen white corn
- 1 1/2 cups grated Monterey Jack (6 ounces) cheese
- 1 teaspoon kosher salt, plus more to top chicken breasts
- 1/4 teaspoon freshly ground pepper, plus more to top chicken breasts
- 10 6-inch corn tortillas
- sour cream for topping
Tomatillo salsa:
- 1 pound tomatillos, papery husks removed, rinsed, and coarsely chopped
- 1/2 of a normal sized red onion, cut into large chunks
- 1 jalapeño, ribs and seeds removed, cut into large pieces
- 1 cup fresh cilantro leaves
- 1 tablespoon fresh lime juice
- 1/2 teaspoon sea salt
First things first, let’s cook up the chicken if you’re using chicken breasts. If you’re using a rotisserie chicken then you can move on. We’re not fans of dark meat in this house, so I always just roast up some breasts when a recipes calls for shredded or cubed chicken. Note: For time efficiency, the chicken can be roasted and shredded up ahead of time and stored in the refrigerator until needed.
Preheat oven to 350 degrees. Place the chicken breasts skin side up on a rimmed baking sheet. Rub them with olive oil and sprinkle with salt and pepper.
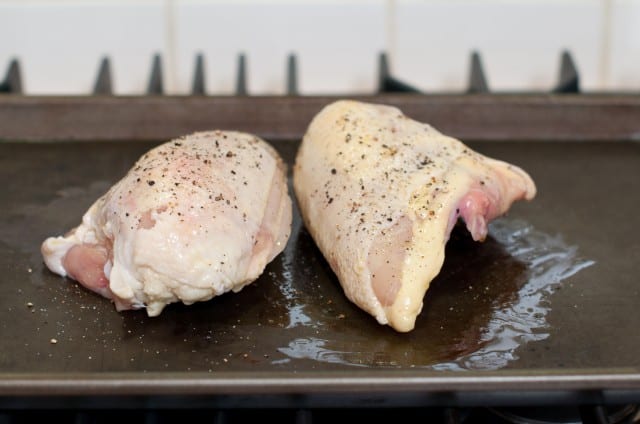
Roast the breasts for 35 to 40 minutes or until chicken is cooked through. I always use my meat thermometer here and take the chicken out when it reaches an internal temperature of 165º.
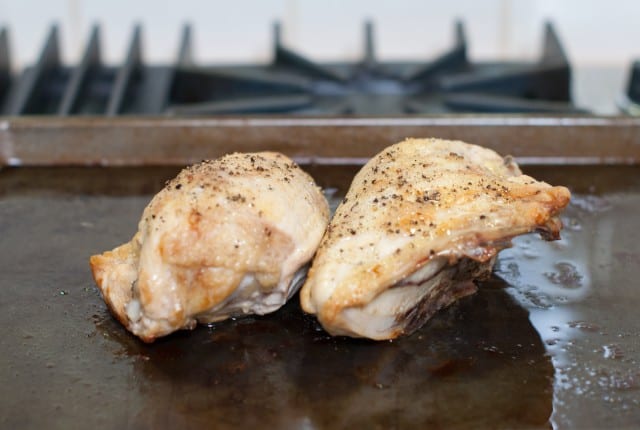
Want to know a super cool trick for shredding chicken? I learned this step from my good friend Carolyn. While the chicken breasts are still pretty warm, (you really want them warm to hot for this next step to work) remove the skin from chicken and then using a knife, slice the chicken breast off of the bone. Get out your kitchen aid mixer, throw the chicken breasts into the bowl and put your paddle attachment on.
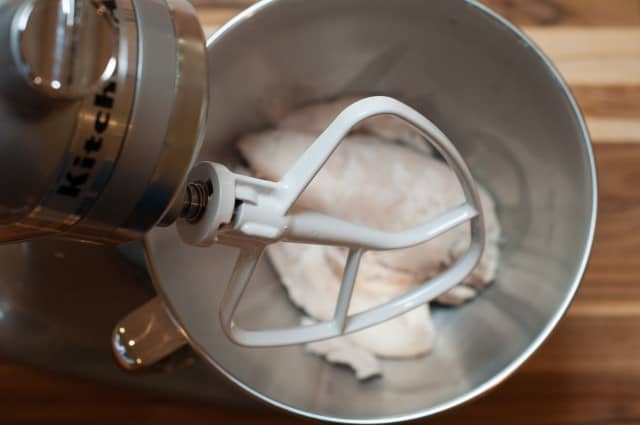
Turn the mixer on to speed 4 and in approximately 20 seconds you will have shredded chicken. Super cool right? I didn’t believe it either till I saw it with my own eyes. See, now you can believe it as well because there’s proof in the below photo. I don’t always do this step, but I wanted to show it to you. I usually just shred the breasts by hand because I don’t always want to clean up another bowl or appliance. I can be lazy that way.
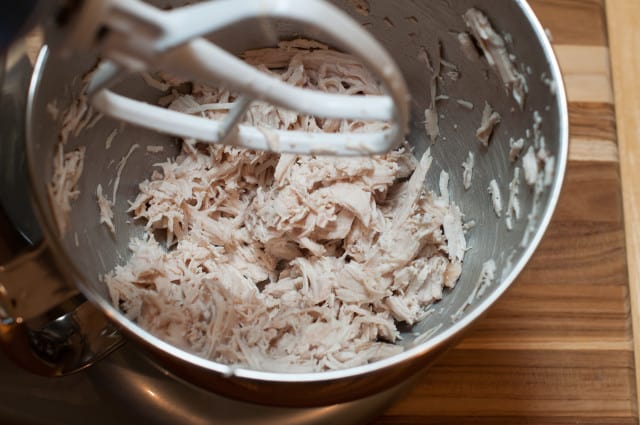
Once your chicken has been shredded, it’s time to start assembling the enchiladas. Preheat your oven to 400 degrees for the enchiladas.
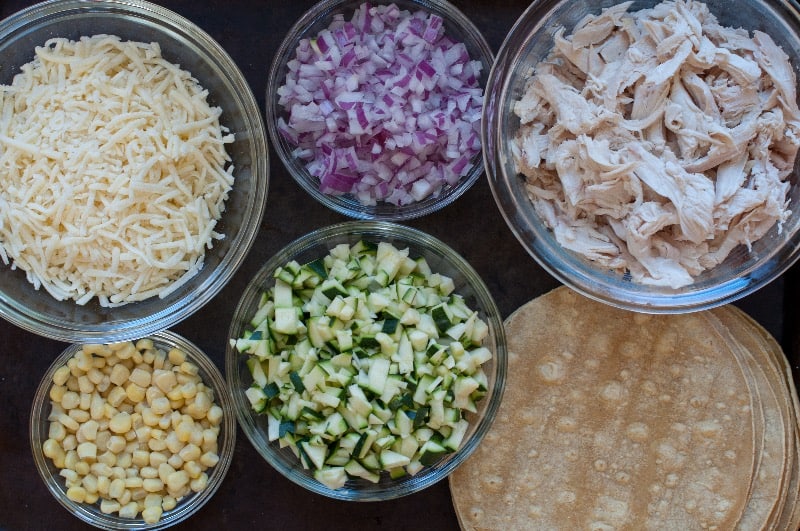
While your chicken is baking, make sure to take out your 1/2 cup frozen corn so it can thaw. If you’re using a rotisserie chicken, then take the frozen corn out at least 1/2 hour before you’re going to make the enchiladas. Of course, if you’re using fresh corn, then you don’t have to worry about thawing the corn. Wash and dice up your zucchini, dice half of your red onion and reserve the other half for the salsa. Measure out the 1- 1/2 cups of Monterey Jack cheese.
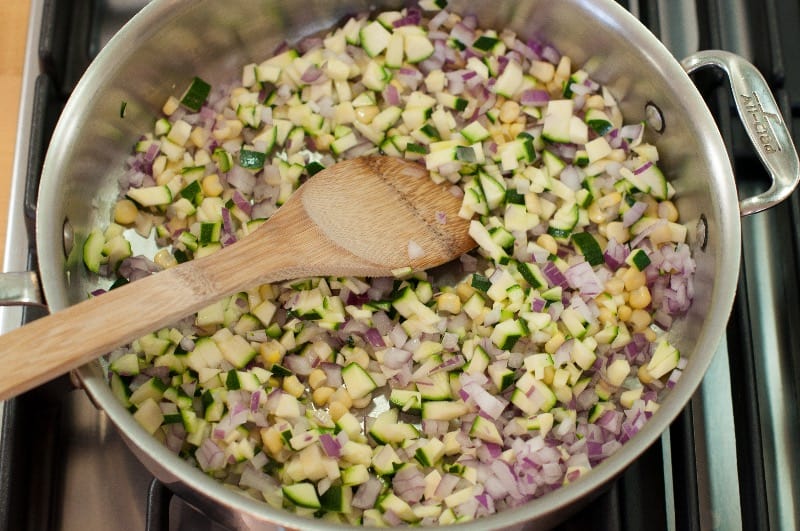
Heat 1 tablespoon of the safflower or canola oil in a medium skillet over medium-high heat. Add the zucchini, onion and corn and cook, stirring, until the onion begins to soften, 3 to 5 minutes.
Transfer the sautéed veggies to a large bowl. Add to the veggies, the shredded chicken, 1 1/2 cups Monterey jack cheese, 1 teaspoon salt and 1/4 teaspoon pepper. Mix to combine.
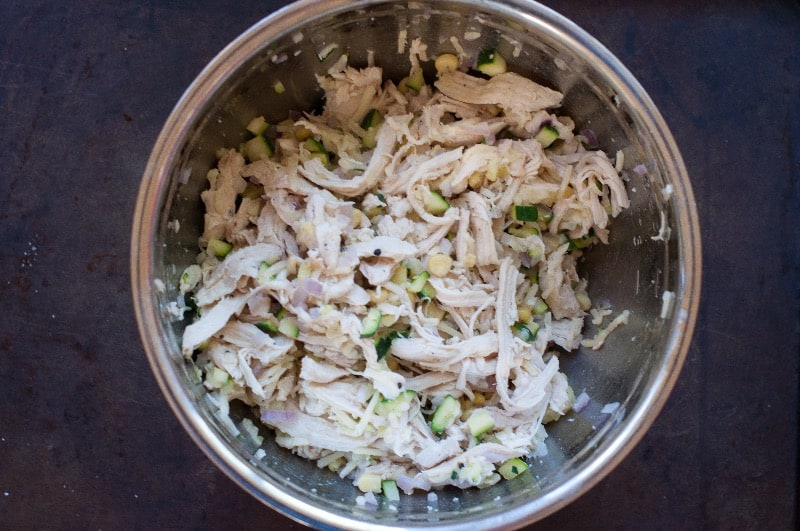
Now its time to heat up your corn tortillas so they do not break apart while rolling them. You can either use a cast-iron skillet or wipe clean the skillet that you cooked the veggies in. Heat up the remaining 3 tablespoons of safflower or canola oil over medium heat. One at a time, cook the tortillas in the oil, until softened, 10-15 seconds per side, adding in another tablespoon of oil if the pan gets too dry. Transfer to a paper-towel lined plate. These tortillas will be a bit greasy, so make sure that you blot them well with the paper towels.
Lay the 10 softened tortillas on work surface; mound the chicken mixture on half of each tortilla, dividing evenly. Its best to put the chicken to one side of your tortilla and roll it up from there.
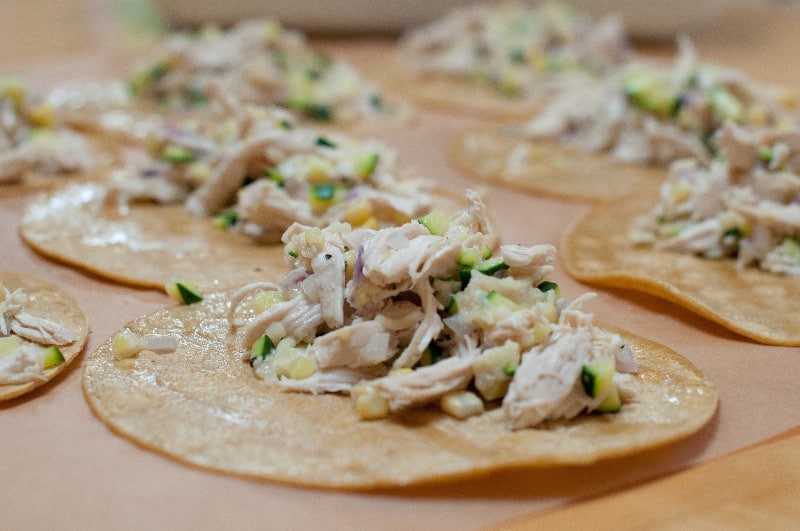
Roll it up as you would a sleeping bag. Roll up each tortilla into a tight log; place seam side down in the baking dish. It’s going to be a tight fit here, just squeeze them in and you can even put some on the side as I show below. You might have a few tortillas that crack, but that’s normal and ok. The enchiladas will still taste great.
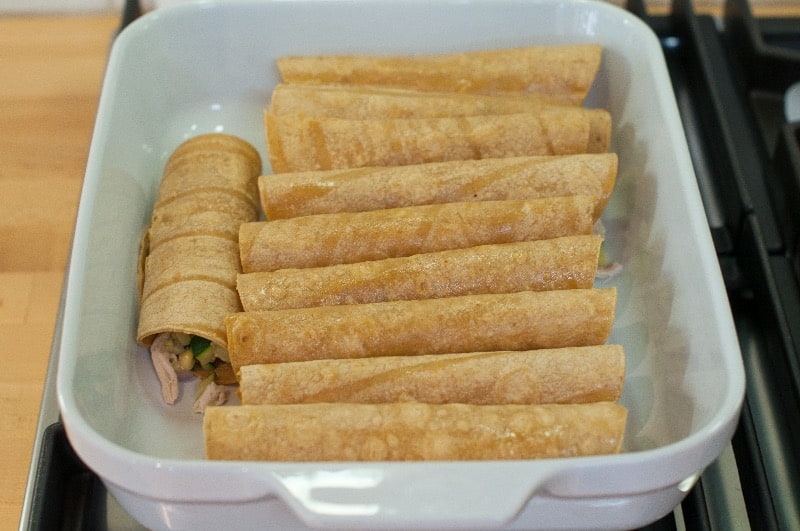
Bake the enchiladas uncovered, until heated through, 8-10 minutes.
Now, let’s move onto the tomatillo salsa. You can make the salsa ahead of time or while the chicken breasts are roasting, or while the enchiladas are cooking. Whatever works for you.
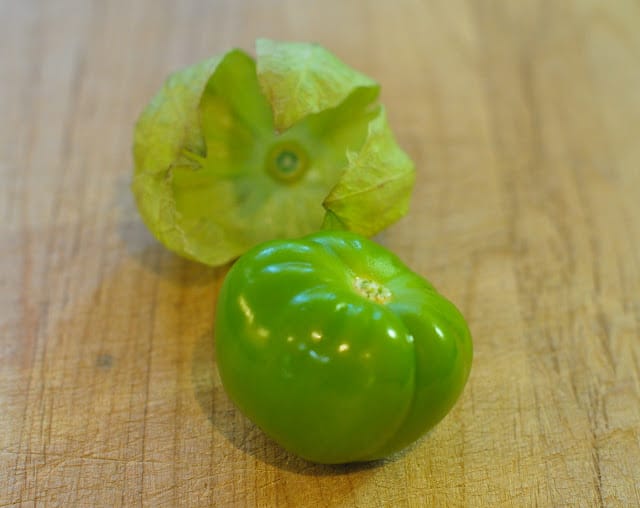
These are tomatillos in case you were not sure what they looked like. They don’t look so pretty on the outside, but take away their outer skin and underneath you will find a bright green beauty.
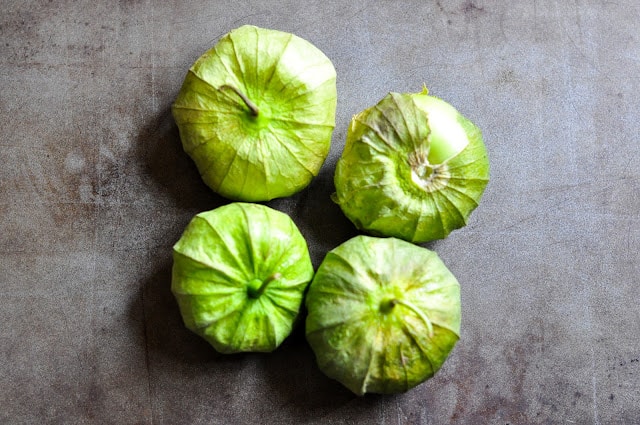
Remove the husk from the tomatillos and wash off the sticky film. They are sticky little suckers until you rinse them.
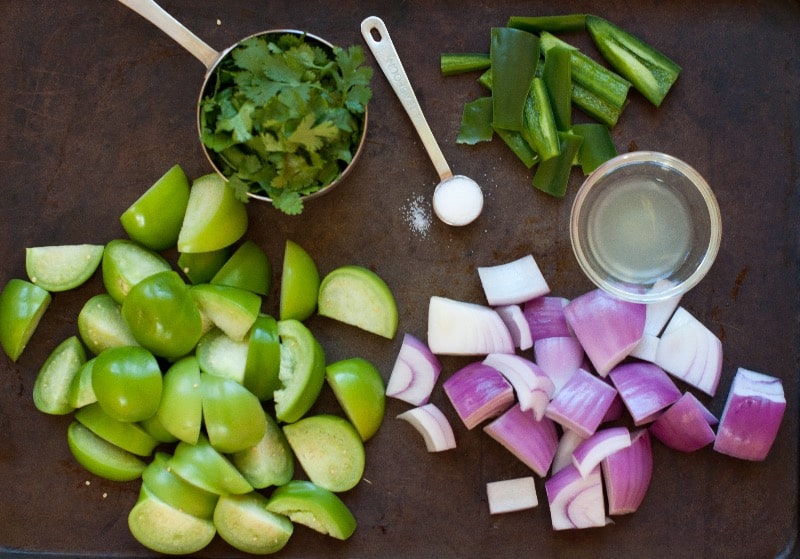
Let’s prep the ingredients for the salsa. Peel, wash and chop up the tomatillos, chop the reserved red onion into large chunks, wash, de-seed and chop your jalapeño pepper, wash your cilantro and remove the leaves from the stems, and squeeze your tablespoon of lime juice.
Get out your food processor and throw in the tomatillos, red onion, jalapeño, cilantro, lime juice and 1/2 teaspoon sea salt.
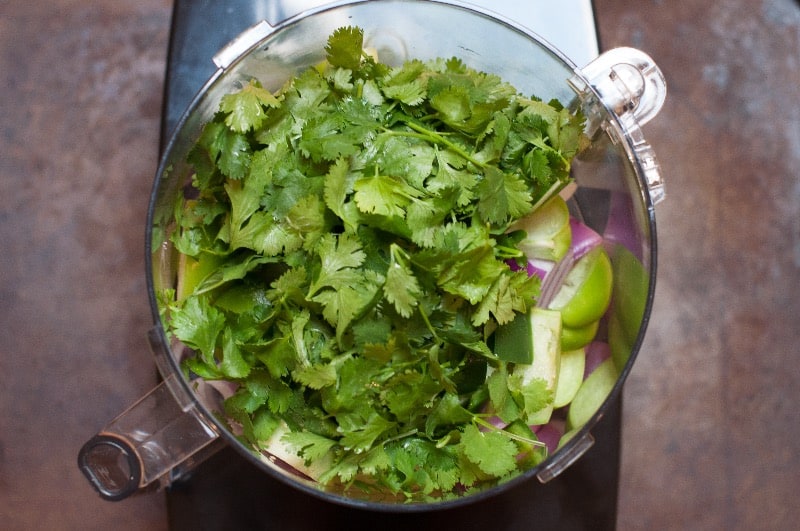
Pulse until finely chopped. You will want to get in there with a spatula to scrape down the sides once during the process.
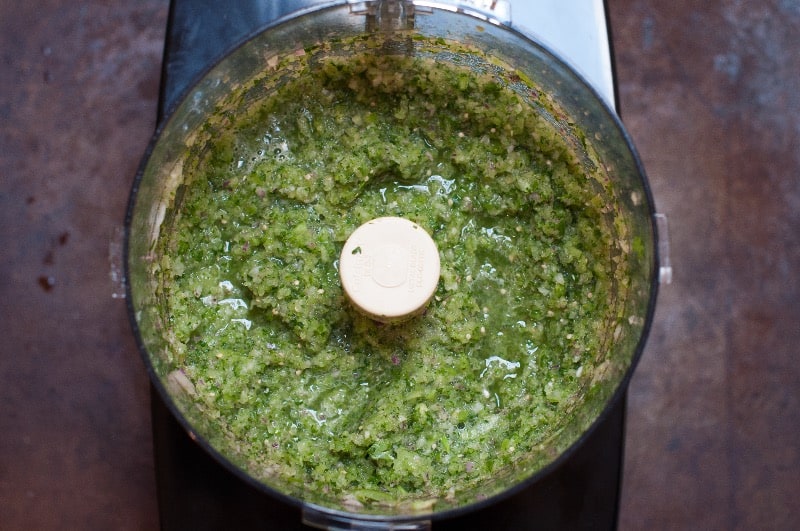
Pour the salsa into a large bowl. This salsa tastes great on tortilla chips as well, and it’s not too spicy.
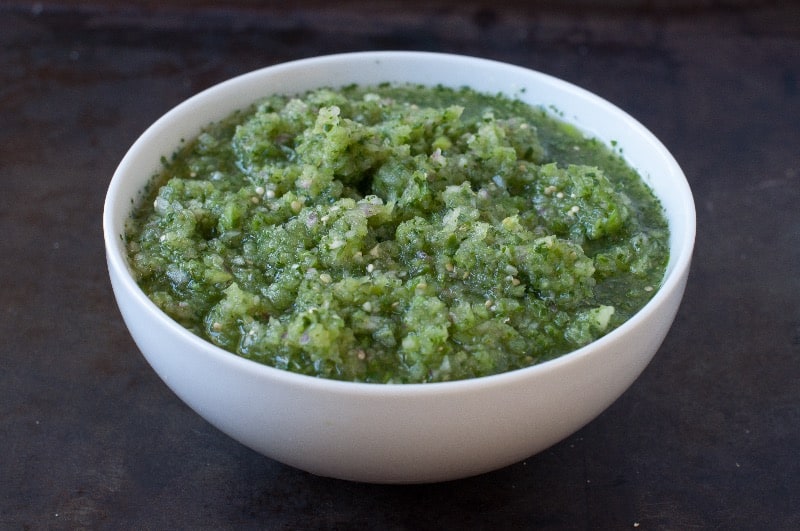
Top the enchiladas with the tomatillo salsa and a dollop of sour cream. This salsa really pairs well with the enchiladas, so don’t be afraid to add a nice amount to your enchiladas.

If you like enchiladas, then try these chicken enchiladas with pumpkin sauce. They’re the bomb and totally kid approved.
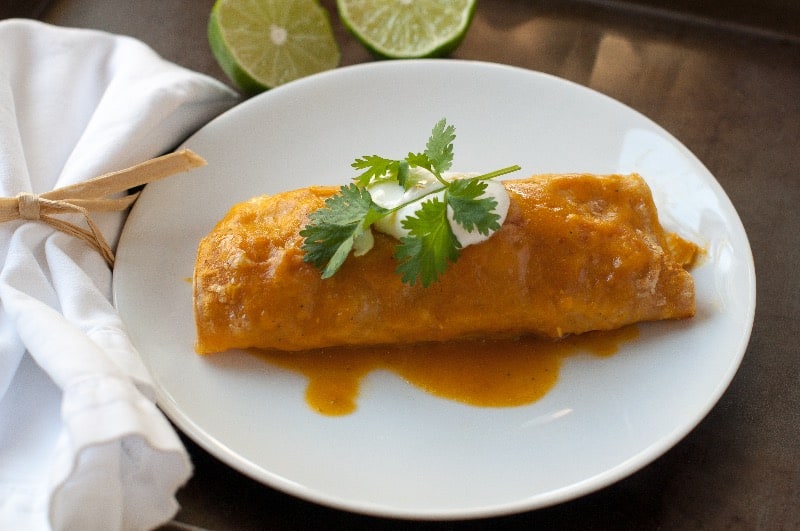

Chicken Enchiladas with Tomatillo Salsa
4-6
servingsIngredients
2 bone-in skin on chicken breasts or 1 2-to 2½-pound rotisserie chicken, meat shredded
Splash of olive oil
4 tablespoons safflower or canola oil - You can really use any high-heat neutral oil of choice here
2 small zucchini, diced
½ of a normal sized red onion, diced
½ cup corn kernels (from 1 ear, or frozen and thawed) - I used frozen white corn
1½ cups grated Monterey Jack (6 ounces) cheese
1 teaspoon kosher salt, plus more to top chicken breasts
¼ teaspoon freshly ground pepper, plus more to top chicken breasts
10 6-inch corn tortilla
Sour cream for topping
- Tomatillo salsa:
1 pound tomatillos, papery husks removed, rinsed, and coarsely chopped
½ of a normal sized red onion, cut into large chunks
1 jalapeño, ribs and seeds removed, cut into large pieces
1 cup fresh cilantro leaves
1 tablespoon fresh lime juice
½ teaspoon sea salt
Directions
First things first, let's cook up the chicken if you're using chicken breasts. If you're using a rotisserie chicken then you can move on. We’re not fans of dark meat in this house, so I always just roast up some breasts when a recipes calls for shredded or cubed chicken. Note: For time efficiency, the chicken can be roasted and shredded up ahead of time and stored in the refrigerator until needed
Preheat oven to 350 degrees. Place the chicken breasts skin side up on a rimmed baking sheet. Rub them with olive oil and sprinkle with salt and pepper.
Roast the breasts for 35 to 40 minutes or until chicken is cooked through. I always use my meat thermometer here and take the chicken out when it reaches an internal temperature of 165º.
Want to know a super cool trick for shredding chicken? I learned this step from my good friend Carolyn. While the chicken breasts are still pretty warm, (you really want them warm to hot for this next step to work) remove the skin from chicken and then using a knife, slice the chicken breast off of the bone. Get out your kitchen aid mixer, throw the chicken breasts into the bowl and put your paddle attachment on.
Turn the mixer on to speed 4 and in approximately 20 seconds you will have shredded chicken. Super cool right? I didn’t believe it either till I saw it with my own eyes. I don't always do this step, but I wanted to show it to you. I usually just shred the breasts by hand because I don't always want to clean up another bowl or appliance. I can be lazy that way.
Once your chicken has been shredded, it’s time to start assembling the enchiladas. Preheat your oven to 400 degrees for the enchiladas.
While your chicken is baking, make sure to take out your ½ cup frozen corn so it can thaw. If you're using a rotisserie chicken, then take the frozen corn out at least ½ hour before you're going to make the enchiladas. Of course, if you're using fresh corn, then you don't have to worry about thawing the corn. Wash and dice up your zucchini, dice half of your red onion and reserve the other half for the salsa. Measure out the 1-1/2 cups of Monterey Jack cheese.
Heat 1 tablespoon of the safflower or canola oil in a medium skillet over medium-high heat. Add the zucchini, onion and corn and cook, stirring, until the onion begins to soften, 3 to 5 minutes.
Transfer the sautéed veggies to a large bowl. Add to the veggies, the shredded chicken, 1½ cups Monterey jack cheese, 1 teaspoon salt and ¼ teaspoon pepper. Mix to combine.
Now its time to heat up your corn tortillas so they do not break apart while rolling them. You can either use a cast-iron skillet or wipe clean the skillet that you cooked the veggies in. Heat up the remaining 3 tablespoons of safflower or canola oil over medium heat. One at a time, cook the tortillas in the oil, until softened, 10-15 seconds per side, adding in another tablespoon of oil if the pan gets too dry. Transfer to a paper-towel lined plate. These tortillas will be a bit greasy, so make sure that you blot them well with the paper towels.
Lay the 10 softened tortillas on work surface; mound the chicken mixture on half of each tortilla, dividing evenly. Its best to put the chicken to one side of your tortilla and roll it up from there.
Roll it up as you would a sleeping bag. Roll up each tortilla into a tight log; place seam side down in the baking dish. It's going to be a tight fit here, just squeeze them in and you can even put some on the side of the pan. You might have a few tortillas that crack, but that's normal and ok. The enchiladas will still taste great.
Bake the enchiladas uncovered, until heated through, 8-10 minutes.
Now, let's move onto the tomatillo salsa. You can make the salsa ahead of time or while the chicken breasts are roasting, or while the enchiladas are cooking. Whatever works for you.
Let's prep the ingredients for the salsa. Remove the husk from the tomatillos and wash off the sticky film, and then chop up the tomatillos, chop the reserved red onion into large chunks, wash, de-seed and chop your jalapeño pepper, wash your cilantro and remove the leaves from the stems, and squeeze your tablespoon of lime juice.
Get out your food processor and throw in the tomatillos, red onion, jalapeño, cilantro, lime juice and ½ teaspoon sea salt.
Pulse until finely chopped. You will want to get in there with a spatula to scrape down the sides once during the process.
Pour the salsa into a large bowl. This salsa tastes great on tortilla chips as well, and it's not too spicy.
Top the enchiladas with the tomatillo salsa and a dollop of sour cream. This salsa really pairs well with the enchiladas, so don't be afraid to add a nice amount to your enchiladas.
Note:
- You only need 1 red onion here, you will use ½ for the enchiladas and ½ for the salsa
Did you make this recipe?
Tag @marinmamacooks on Instagram and hashtag it #MarinMamaCooks
Like this recipe?
Follow us @marinmama on Pinterest
Did you make this recipe?
Follow us on Facebook
Nourish your inbox!
Dairy free green goddess dressing. This is my dairy free, vegan take on a green goddess dressing. I wanted to create a tasty dairy free version, while focusing on keeping the ingredients ultra clean, so I used a coconut based yogurt @cocojune_organic that doesn’t contain gums, or other ingredients you can’t pronounce.
Comment “green” and I’ll DM you the recipe link.
The result, we love this dressing and have been making it on repeat. I love how creamy and vibrant this dressing is and how it coats each piece of lettuce. I also love how interchangeable the herbs are. You can truly use what you have on hand.
This dressing isn’t just for salads, you can use as a dip for veggies, sweet potato fries, or drizzle over grilled or roasted chicken. The possibilities are endless. 💕
#greengoddessdressing #greengoddesssalad #greengoddess #healthyfood #saladdressing #dairyfreesalad #dairyfreerecipes #vegandressing #vegansalad #salad #healthysalad #healthysalads

I want to share with you guys a simple lesson about reading ingredients. Here’s my favorite brand of coconut milk, Native Forest. As you can see, they have 2 kinds of the full fat unsweetened coconut milk, one is called simple, and one is classic. The difference here is in the ingredients, one contains guar gum and one doesn’t.
You really want to look at the labels and the ingredients, and not just trust the brand is the same across all products.
I love this Native Forest, Simple, because again it clearly states no quars, and if you look in the ingredients, you’ll see organic coconut milk, organic coconut, filtered water. Simple whole food ingredients, no added fillers, gums, or flavors. You always want to look for a BPA free cans and the USDA organic stamp, which means its certified organic, so there’s no GMO’s, pesticides etc.
What is guar gum, and why is it bad?
Guar gum, which is derived from the guar bean is a thickening agent that can wreak havoc on your digestive system by causing bloating, gas, and discomfort. It can disrupt the delicate balance of your gut microbiome, leading to inflammation and impaired nutrient absorption. It’s also seen a lot in non-dairy creamers or milks.
Was this helpful? If so, let me know in the comments below, 👇 as well as what else you would like to see, or know more about?
#readlabels #readfoodlabels #guargum #guthealth #guthealing #inflammationrelief #antiimflammatory

Easy buckwheat porridge. If you’re looking to switch up your morning bowl of oats, then give buckwheat a try. It has a chewy texture and mild flavor, that pairs with just about anything.
Comment ‘easy buckwheat’ and I’ll send you the recipe.
This buckwheat porridge is SO EASY to make, and is naturally gluten-free, dairy-free, and vegan to boot, and the bonus is it takes under 15 minutes to whip up in the morning.
This breakfast is hubby approved. Steve tried this the other day and kept saying, “this is the best breakfast,” “man, this is SO good.” So if I can get my mountain biking, carb loving hubby to happily eat of bowl of this, then I think your family might love this too.
I love topping mine with blueberries, @socotahini and bee pollen!
#buckwheat #buckwheatporridge #buckwheatrecipes #porridgebowl #porridge #porridgelover #breakfastideas #breakfast #healthybreakfast #healthybreakfastclub #healthybreakfastideas

Rosemary & thyme turkey burgers. These are not your typical dry turkey burgers. The rosemary and thyme paired with the sautéed red onion give these burgers a pop of flavor, and the Dijon and avocado oil pump up the moisture. These burgers are also gluten-free and dairy-free.
Comment ‘turkey burger’ and I’ll DM you the recipe link.
I love topping these burgers on a big green salad and pairing them with my oven roasted sweet potato fries. Delish! #turkeyburger #turkeyburgers #burger #dairyfreeglutenfree #burgers #healthyfood

These vegan Mexican quinoa bowls have become a weekly staple in our house. They’re naturally vegan, but are full of flavor from the avocado tahini, and spicy chipotle tahini sauce.
Comment ‘vegan bowl’ and I’ll DM you the recipe.
These bowls are also great for those that are on the candida diet.
I ❤️ these bowls because they’re jam packed with plant protein, as quinoa is a complete protein, and beans when paired with the quinoa, make a complete protein too. This bowl is balanced and satisfying from the slow burning carbs, healthy fats, plant protein, and will honestly sustain you for hours.
These bowls are a great weeknight meatless dinner option, as I typically make the sauces ahead of time, (they literally take 5 minutes) so when it comes to dinner time, all I have to do is make the quinoa (takes under 20 minutes) and roast the sweet potatoes. I hope you give these a try, and that they become a go-to meatless dinner.
#candidadiet #candidacleanse #veganbowls #veganbowls #veganrecipes #veganrecipe #vegandinner #vegandinnerideas #healthyfood

Here’s the perfect snack for those of you trying to cut back on refined sugar. These healthy no bake cacao oat bars are super addicting, once you have a bite, you just can’t stop.
Comment ‘oat bars’ and I’ll DM you the recipe.
The great thing is you don’t have to feel guilty, as these are made with pretty healthy ingredients and are GF, DF and refined sugar free. I love having these on hand for that afternoon, or post lunch craving. They hit the spot perfectly. #healthy #healthysnacks #healthysnackideas #healthysnack #refinedsugarfree #norefinedsugar #healthydesserts #healthydessert #healthydessertrecipes #healthysnackrecipes




Those look so delicious! That trick with shredding chicken in the kitchenaid mixer is genius! I never would have thought that. I’ll have to try that next time. Your pictures always make me drool. 🙂
Hope you have a great day, Jackie! It’s a beautiful day here today so I’m going to get some work done and hopefully take a walk at lunch time. xoxo, Sharon
You had me at tomatillo! This will be in the rotation this summer! Looks Delish!
Lisa 🙂
These look great girl! I love the tip about shredding chicken using the kitchenaid! I would have never thought of that!
I’m so glad you like the chicken shredding tip!! It’s so great, especially if you want to make a big batch at the beginning of the week (or weekend) for dishes throughout the week (think chicken salad, salad bar, quesadillas, chicken hash with a poached egg, chicken with kale and lentils (I emailed you that recipe), peanut noodles with chicken, chicken noodle soup…..okay okay I’m done, but you get the point. I look forward to trying this recipe especially when I can get my hands on some tomatillos at the farmers market, shouldn’t be too long before we’ll see them with all the hot weather you’ve been getting!!!
Jackie,
Your spring enchiladas look absolutely amazing! I have never heard of shredding chicken that way, but since you have the photos to prove it, I’m going to try it next time. I’ll try the enchiladas soon, but tonight it’s your buttermilk chicken!
xo
annie
Pinned! I’ll be making these FOR SURE!!
I tried this today, I am an amateur in the kitchen and this has got to be the most yummy thing I have ever cooked for myself by myself. It is also the first time I tried to make a mexican dish.
Thank You So much for the recipe! I used chicken thighs instead of breast as the store had ran out, and added mushrooms simply because they were lying around.
I couldn’t make the salsa because tomatillo isn’t available easily here in Abu Dhabi where I live. Even then it tasted so good!
Thank You so much Jacquelyn, you are an answer to all my food prayers 🙂
Love
Meha
Hi Meha! Awww…. Thanks so much for your super sweet comment. I’m so happy that you made and loved this dish. It’s one of our favorites as well, and you have reminded me that I need to make it up again soon! I’m so happy you love the blog, and I hope that you find many more recipes on here to make 🙂 Cheers Meha! xoxo, Jackie
Thank You for the lovely reply Jackie, yes I vowed that I would cook my own food and be healthy. I eat the steel cut oats for breakfast at work everyday now and I followed your recipe which was so cute and I also made the banana bread last night and I am trying my had at the french toast recipe now..
Your blog is the best thing I have found online in a long time.
Thank You once again, its a priceless resource and can feel you love in each work that you type…
Cheers and looking forward to more entries from you! 🙂
Regards
Meha